Key takeaways
- Home charging is where 90% of EV charging happens.
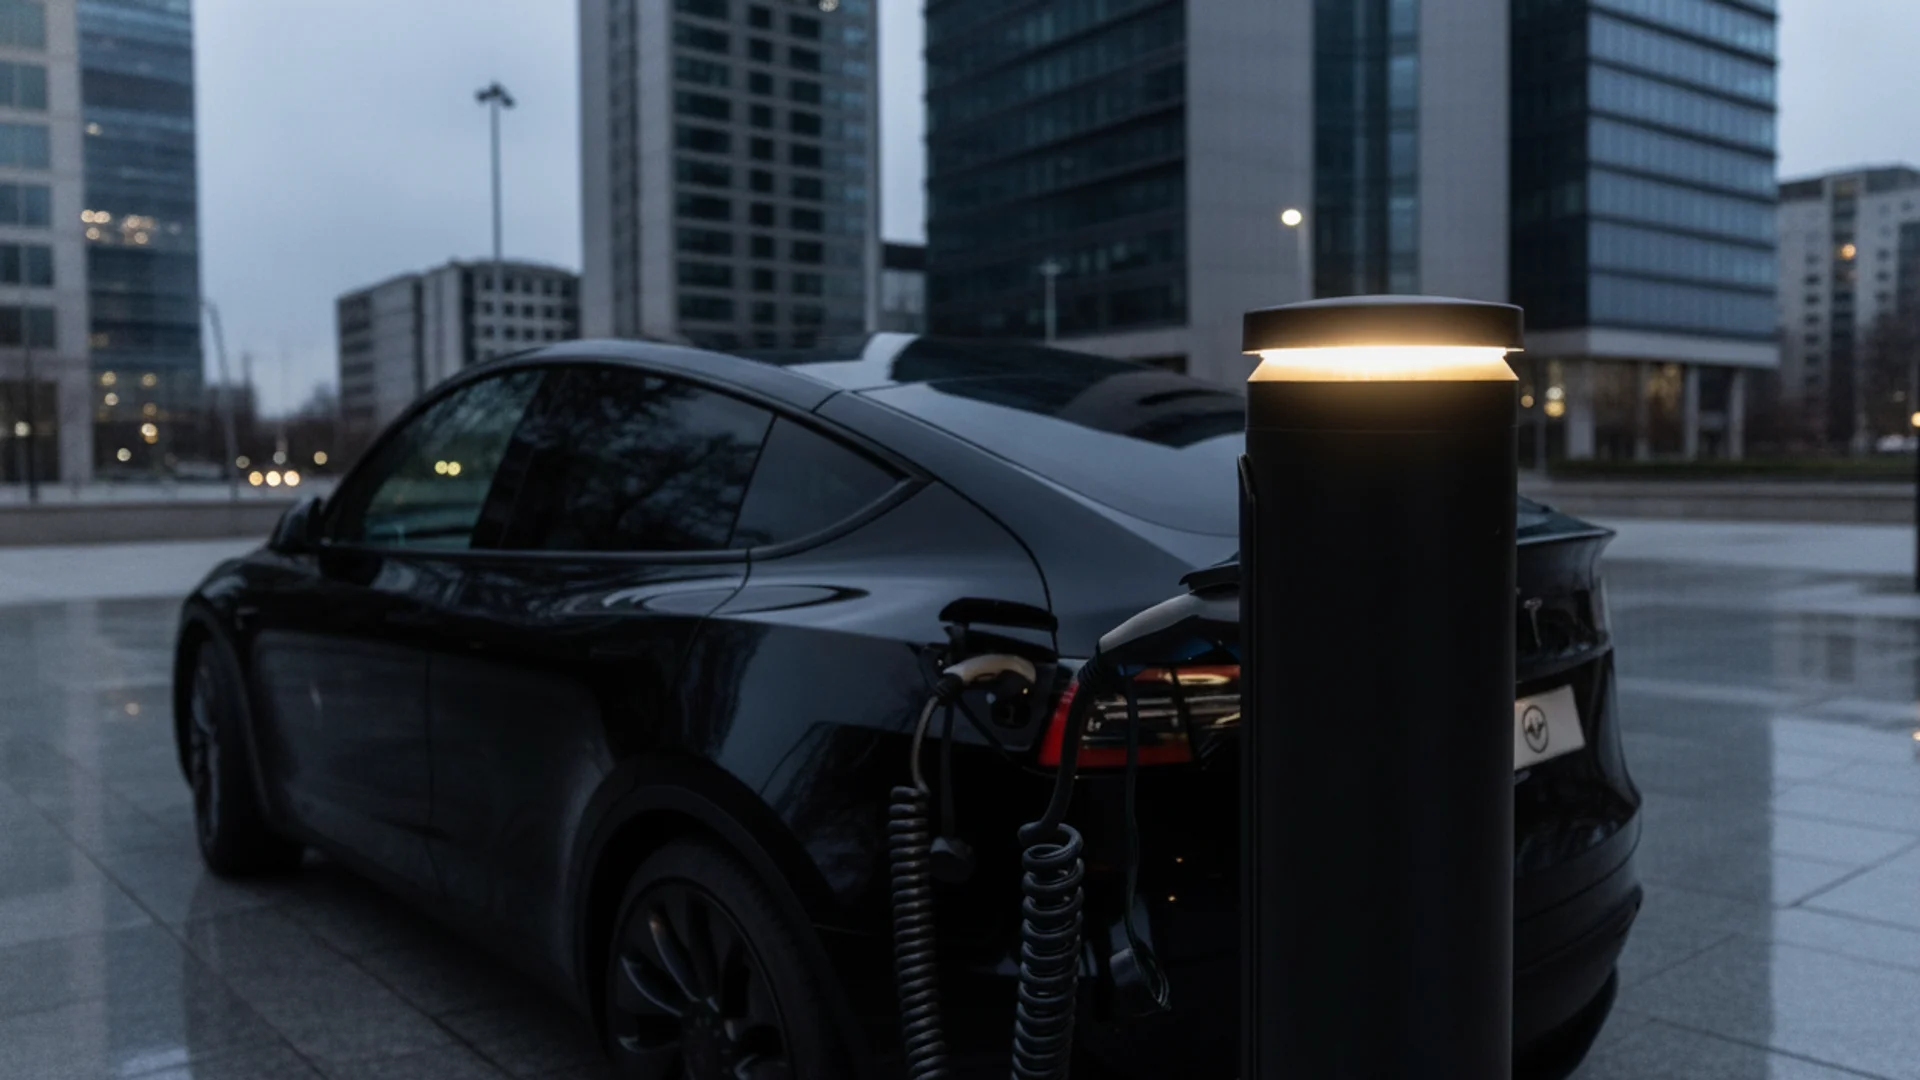
- A Level 2 charger operates at 240 volts and draws 40-48 amps, delivering 30-50 km of range per hour of charging.
- An overnight charge of 8-10 hours covers 300-500 km.
Gear worth having
As an Amazon Associate, ThinkEV earns a small commission from qualifying purchases — at no extra cost to you.

Grizzl-E Classic Level 2 EV Charger (40A)
Canadian-made and rated for minus 40C winters. 40A / 9.6 kW, NEMA 14-50, indoor/outdoor, 24-ft cable. The charger built for Canadian weather.
As an Amazon Associate, ThinkEV earns from qualifying purchases — at no extra cost to you.
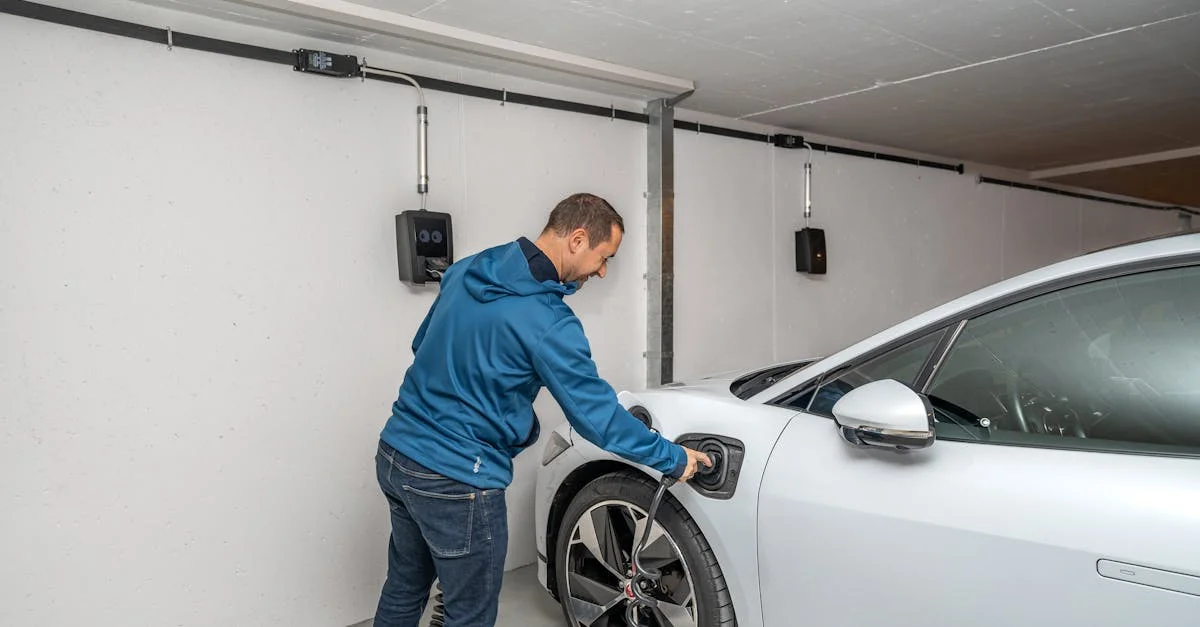
A Level 2 home charger delivers 30-50 km of range per hour and an overnight charge covers 300-500 km, more than most Canadians drive in a week. The total cost runs $1,000-$2,600 for a typical installation, and the single biggest variable is whether your electrical panel is a 200-amp or a 100-amp. Get that answer before you buy anything else.
The total cost breaks down into three parts: the charger unit ($500-$1,100), professional installation ($500-$1,500), and potentially an electrical panel upgrade ($1,500-$3,000 if needed). Most homes built after 2000 with a 200-amp panel will not need the upgrade. Your all-in cost for a typical installation is $1,000-$2,600. In a best-case scenario, short wiring run, modern panel, attached garage, you can be fully set up for around $1,000. Complex jobs with panel upgrades and long conduit runs push the total to $3,500 or beyond.
This guide covers everything: assessing your electrical panel, the full installation process step by step, exact cost scenarios, the best chargers for Canadian conditions, provincial permits and rebates, condo and rental solutions, outdoor installation, multi-EV households, and how to hire the right electrician.
ASSESSING YOUR ELECTRICAL PANEL
Before you buy a charger or call an electrician, you need to understand your electrical panel. This is the single biggest factor in determining what your installation will cost and whether it will be straightforward or complicated.
Finding Your Panel Rating
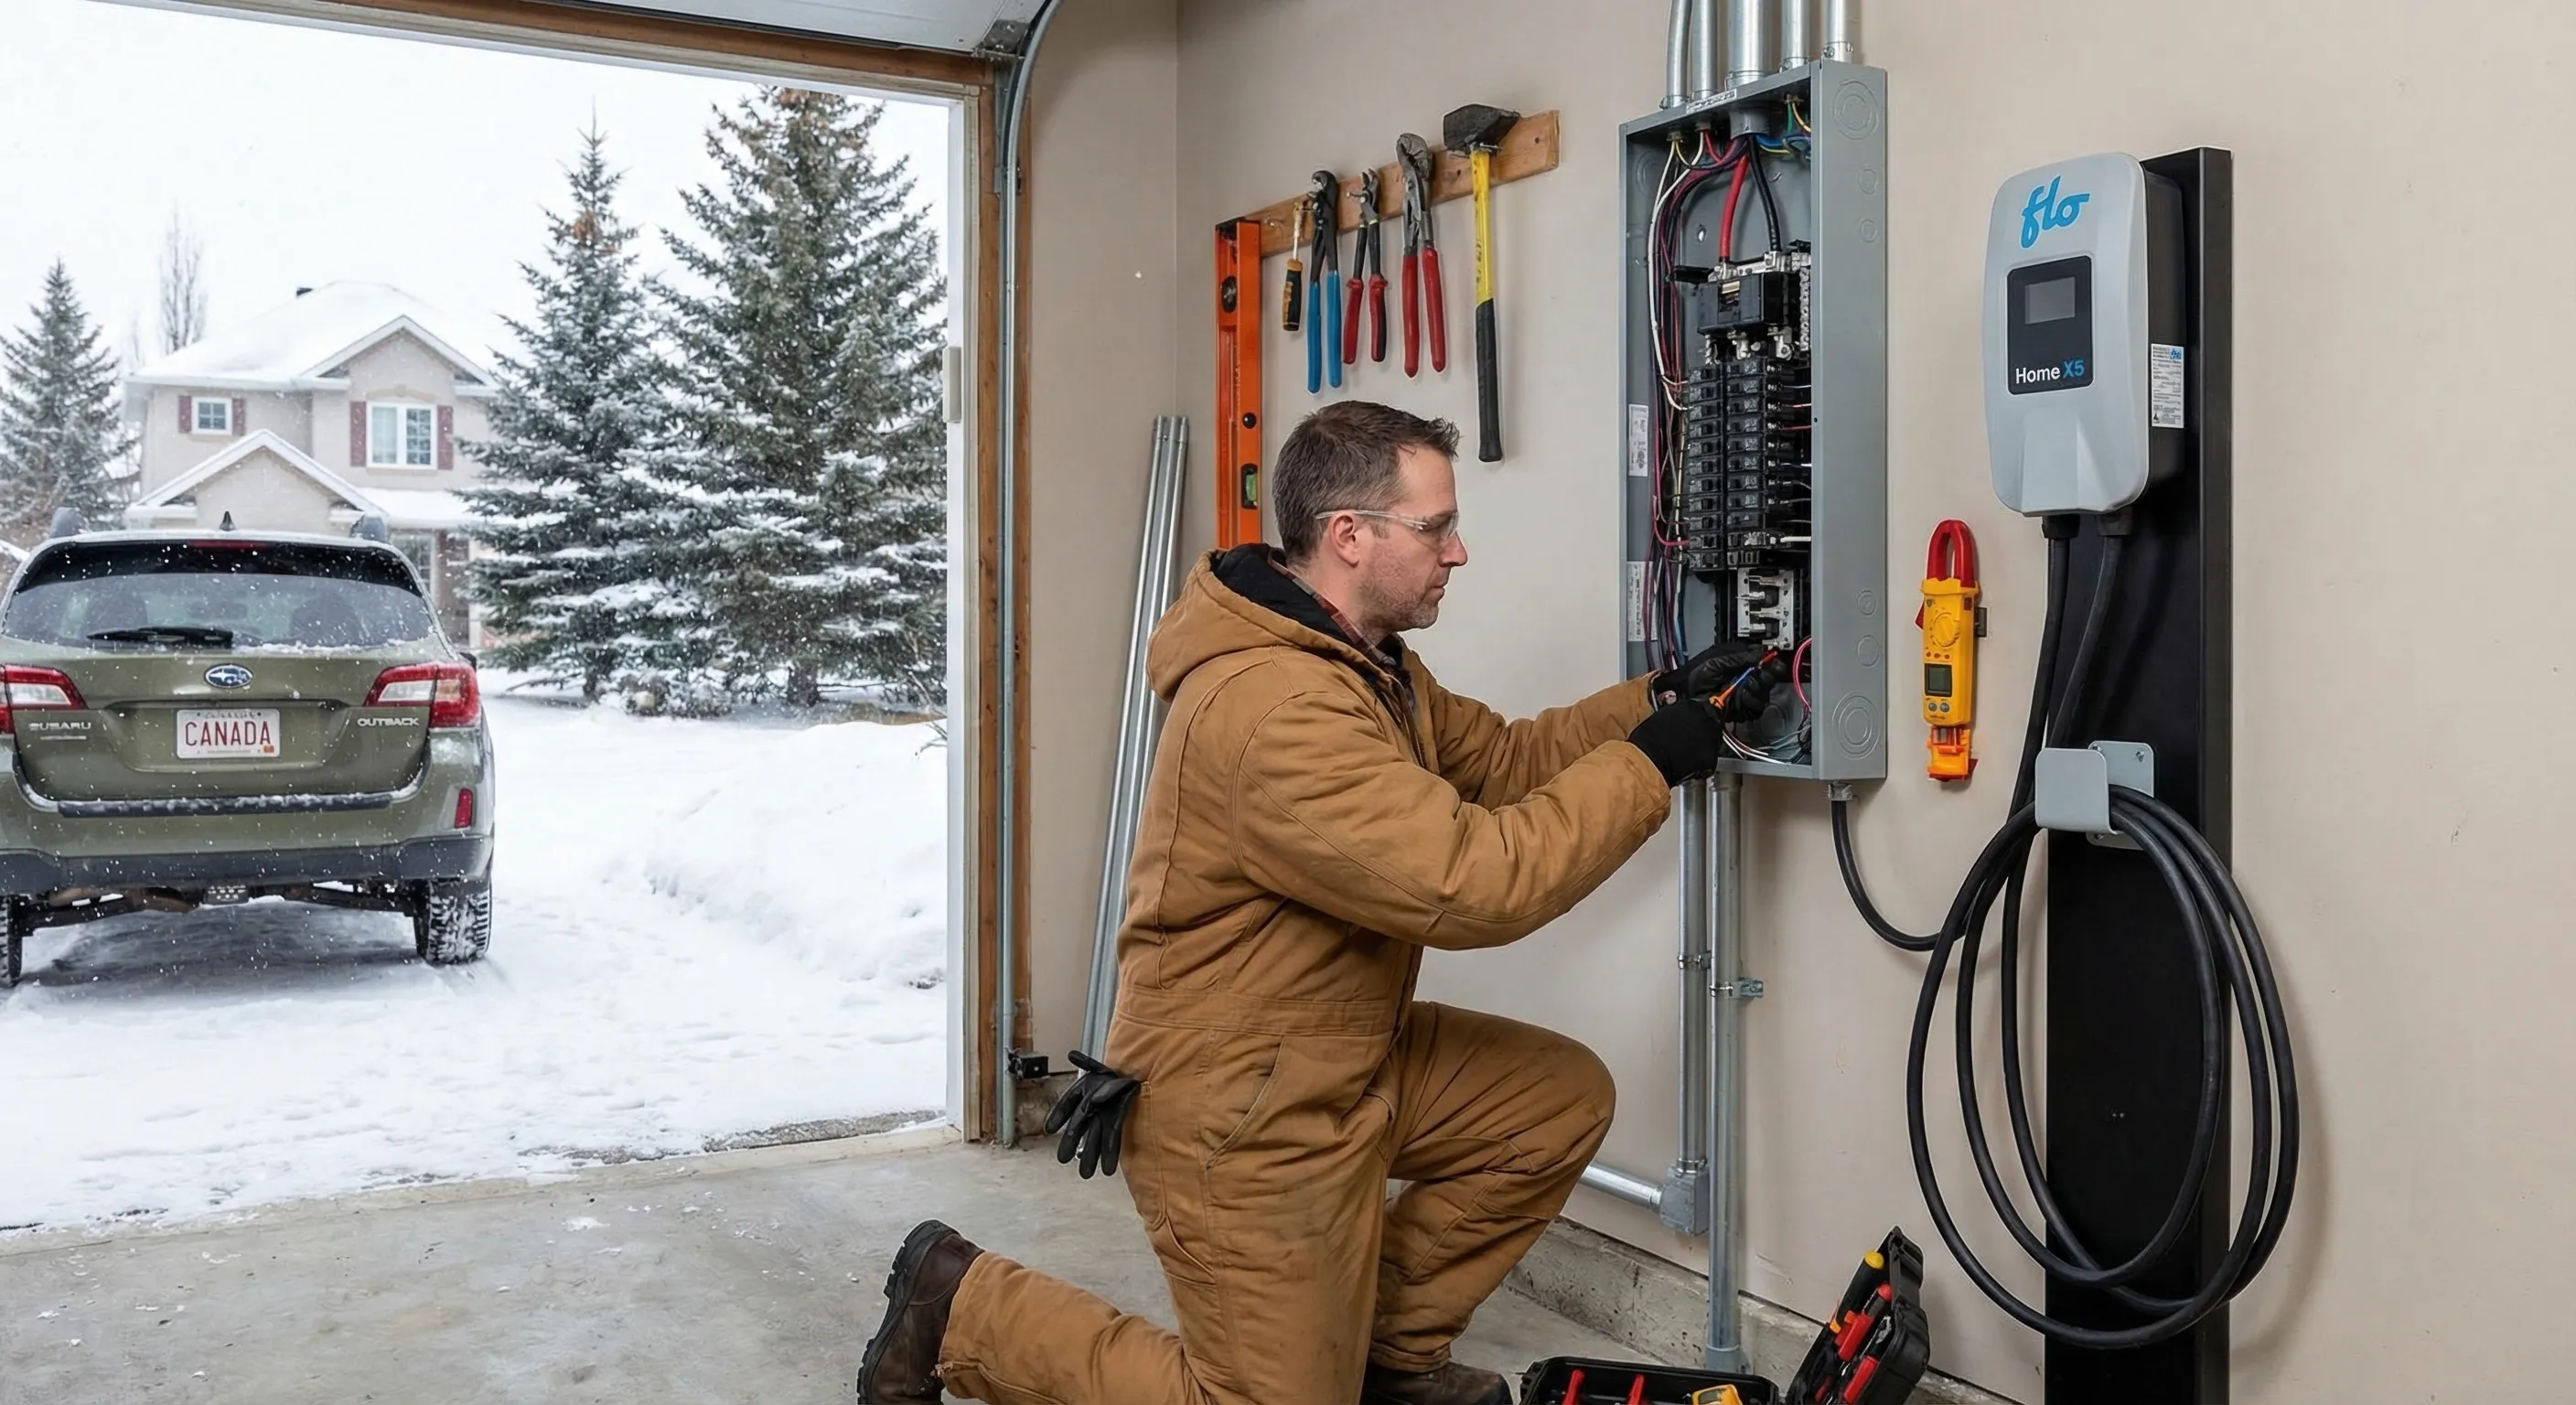
Your main electrical panel is typically in the basement, utility room, or garage. Open the panel door and look for a number on the main breaker at the top, it will say 100, 125, 150, or 200. That number is your service amperage, and it determines how much total electrical load your home can handle.
200-amp panel: This is the standard for homes built after roughly 2000. A 200-amp panel has plenty of capacity for a 40-50 amp EV charger circuit in virtually all cases. Even if you have an electric dryer, electric range, central air conditioning, and a hot tub, a 200-amp panel can typically accommodate an EV charger without any upgrade. This is the best-case scenario, and it covers about 60% of Canadian homes currently on the market.
150-amp panel: A grey area. Some 150-amp panels can handle a 40-amp EV circuit; others cannot. It depends entirely on what other high-draw circuits you already have. If you have an electric dryer (30A), electric range (40-50A), central air (30-40A), and electric water heater (30A), those loads plus a 40A EV charger may exceed your panel's capacity. Your electrician will perform a load calculation, a straightforward mathematical exercise outlined in the Canadian Electrical Code, to determine whether your existing service can handle the additional draw. If it cannot, you either need a panel upgrade or a load management device. Many 150-amp panels can be made to work with load management, saving you the cost of a full upgrade.
100-amp panel: Common in homes built before the 1980s. A 100-amp panel will almost certainly require an upgrade to accommodate a Level 2 EV charger. A 40-amp charger circuit on a 100-amp panel leaves only 60 amps for everything else in your house, lights, refrigerator, furnace fan, washer, dryer, stove, air conditioning. That is not enough for a modern household. Plan for a panel upgrade, which costs $1,500-$3,000 and involves replacing the main breaker panel and potentially upgrading the service entrance cable from the utility. If you are in a home with a 100-amp panel, budget for this from the start so the quote does not catch you off guard.
How to Check Spare Capacity Yourself
You can do a rough assessment before calling an electrician. Open your panel and count the breaker slots. A typical 200-amp panel has 40 slots (20 per side). Each 240V circuit (dryer, range, A/C, EV charger) uses two slots, one double-pole breaker. If you have fewer than four empty slots, your panel may be physically full even if it has enough amperage.
Next, add up your existing large loads. A typical Canadian home might have:
- Electric range: 40A (two slots)
- Electric dryer: 30A (two slots)
- Central air conditioner: 30A (two slots)
- Electric water heater: 30A (two slots)
- Hot tub (if applicable): 40-50A (two slots)
Total those amperages. On a 200-amp panel, the Canadian Electrical Code allows for a calculated load that accounts for demand factors, not all circuits run at full capacity simultaneously. Your electrician will use CEC Section 8 to perform this calculation properly. As a rough rule: if your large loads total less than 120A on a 200-amp panel, you almost certainly have room for a 40-50A EV charger.
Do not confuse physical space with electrical capacity. A panel can have empty slots but not enough amperage, or enough amperage but no empty slots. These are two separate constraints, and your electrician evaluates both.
The Load Management Alternative
If your panel is borderline, not quite enough capacity for a dedicated 40-50 amp circuit, but close, a load management device can save you thousands. These devices (sometimes called "share2," "DCC-9," or "EV load managers") monitor your panel's real-time load and dynamically adjust the charger's power draw. When your dryer or A/C kicks on, the device temporarily reduces the charger's amperage. When the dryer stops, the charger ramps back up.
Load management devices cost $200-$400 installed and can eliminate the need for a $1,500-$3,000 panel upgrade. The trade-off is slightly slower charging during periods of high household demand, but since most charging happens overnight when demand is minimal, the practical impact is negligible. During a typical overnight charging session from 10 PM to 7 AM, the only competing loads are your refrigerator and perhaps a few lights, your charger runs at full power for 95% of the session.
Ask your electrician about this option, it is increasingly common and recognized by the Canadian Electrical Code as a legitimate solution.
WHAT YOU NEED
A Level 2 charger requires a 240-volt circuit, the same type that powers your dryer or oven. You need a dedicated 240V circuit with a 40-amp or 50-amp breaker, delivering 7.2-9.6 kW of charging power. A 48-amp circuit on a 60-amp breaker delivers up to 11.5 kW for faster charging. Three things determine whether your home is ready:
Electrical panel capacity. Covered in detail above. Your electrician assesses this in 15 minutes.
Proximity to your parking spot. The charger needs to be within cable reach of where you park. Every additional metre of wiring run adds roughly $10-$20 in materials and labour. A 5-metre run is trivial. A 25-metre run through walls, ceilings, and exterior conduit can add $500-$1,000 to the installation cost.
An available breaker slot. Your panel needs two open slots for a 240V double-pole breaker. If your panel is full, the electrician may consolidate circuits using tandem breakers ($20-$50 per pair), install a sub-panel ($300-$600), or upgrade the panel ($1,500-$3,000).
PLUG-IN VS HARDWIRED
You have two installation options, and the choice matters more than most people realize.
Plug-in chargers use a NEMA 14-50 outlet (the same outlet type used by many RV parks and electric stoves). The electrician installs the outlet, and you plug the charger in. Advantages: you can unplug and take the charger with you if you move. You can replace the charger without electrical work. It is slightly cheaper to install, typically $50-$100 less than hardwired because the electrician mounts an outlet rather than running wire directly into the charger. If you sell your home, the 14-50 outlet remains as a useful feature for the next owner regardless of which charger they prefer. The Grizzl-E Classic is a popular plug-in option, 40 amps, 9.6 kW, weatherproof, and built in Canada.
Gear worth having
As an Amazon Associate, ThinkEV earns a small commission from qualifying purchases — at no extra cost to you.

ChargePoint Home Flex Level 2 Charger (50A)
Premium 50A / 12 kW charger with the best app ecosystem. Hardwired or NEMA 14-50, with real-time energy tracking and smart scheduling.
As an Amazon Associate, ThinkEV earns from qualifying purchases — at no extra cost to you.
Hardwired chargers are permanently connected to your electrical panel. The electrician runs wire directly from the panel to the charger. Advantages: slightly more reliable (no outlet connection to loosen over time), required by some local codes, and some models offer higher amperage. At 48 amps and above, most manufacturers recommend hardwired installation because NEMA 14-50 outlets are only rated for 50-amp circuits with a 40-amp continuous load. The ChargePoint Home Flex is a popular hardwired option, up to 50 amps, Wi-Fi enabled, with energy monitoring and adjustable amperage.
Gear worth having
As an Amazon Associate, ThinkEV earns a small commission from qualifying purchases — at no extra cost to you.

Lectron Level 2 J1772 Charger (40A, WiFi)
Smart WiFi charger with real-time energy monitoring. 40A / 9.6 kW, J1772 with a NEMA 14-50 plug, schedule charging right from your phone.
As an Amazon Associate, ThinkEV earns from qualifying purchases — at no extra cost to you.
For most homeowners, a plug-in setup with a NEMA 14-50 outlet is the better choice. It is simpler, slightly cheaper, and gives you flexibility. Hardwired makes sense if your local code requires it, if you want a specific high-amperage charger at 48A or above, or if you plan to stay in your home long-term and want the most permanent connection.
One important distinction: regardless of plug-in or hardwired, the 240V circuit itself must be installed by a licensed electrician. The "plug-in" option does not mean you can do it yourself. Your electrician installs the outlet; you plug in the charger. That is the extent of the DIY component.
THE INSTALLATION PROCESS, STEP BY STEP
From the moment you decide to install a Level 2 charger to the moment you plug in for the first time, the process follows these six steps.
Step 1: Get an Electrician's Assessment
A licensed electrician visits your home, checks your panel capacity, identifies the best route for wiring, and provides a detailed quote. This visit typically costs $75-$150 or may be included in the installation quote if you hire them for the job. In most Canadian cities, you can get 2-3 quotes within a week.
During the assessment, the electrician will evaluate:
- Panel amperage and spare capacity, Can your existing panel handle a 40-50A additional circuit?
- Available breaker slots, Are there two open positions for a double-pole breaker?
- Wiring route, What is the shortest, cleanest path from your panel to the charger location? Does it require running through finished walls, attics, or exterior conduit?
- Wire gauge, A 40A circuit requires 8 AWG copper wire. A 50A circuit requires 6 AWG. A 60A circuit requires 4 AWG. Thicker wire costs more per metre.
- Charger mounting location, Where on the wall will the charger sit? Is the surface suitable (concrete, drywall, plywood backing)? Can the cable reach your vehicle's charge port from the mounting position?
A good electrician will explain all of this during the assessment. If they show up, glance at your panel, and quote you a number without explaining their reasoning, find a different electrician.
Step 2: Choose Your Charger
Buy your charger before the installation date so the electrician can plan the wiring route and outlet or junction box placement based on the specific unit. Some chargers mount with specific bracket patterns, and the wiring entry point varies by model. Having the charger in hand avoids surprises on installation day.
Decide between plug-in and hardwired based on the electrician's recommendation for your situation and your own preference for flexibility versus permanence. If you go plug-in, the electrician installs a NEMA 14-50 outlet at the mounting location. If you go hardwired, they will need access to the charger's wiring compartment.
Step 3: Pull a Permit
Most provinces require an electrical permit for installing a 240V circuit. The permit costs $50-$150 depending on your municipality. Your electrician usually handles the application, it is part of their standard process. Do not skip this step. Unpermitted electrical work can void your home insurance, create problems when you sell your home, and in some provinces, result in fines. The permit also triggers a mandatory inspection, which is your guarantee that the work was done safely and to code.
Step 4: Installation Day
The electrician installs the breaker, runs the wiring, and either mounts the outlet (plug-in) or connects the charger directly (hardwired). Here is what happens in detail:
- Breaker installation: The electrician turns off your main breaker (your home loses power for 30-60 minutes), installs a new double-pole breaker (40A, 50A, or 60A depending on your charger) in two adjacent slots, and connects the wiring. This takes about 30 minutes.
- Wiring run: This is the most variable part. A simple run, panel in the garage, charger on the opposite wall, takes 30-60 minutes.
A complex run, panel in the basement, charger in the detached garage, requiring exterior conduit and possibly a trench, can take 4-8 hours. The wiring is run through conduit for protection, with appropriate connectors and junction boxes at turns and entry points.
- Outlet or charger mounting: For plug-in installations, the electrician mounts a NEMA 14-50 outlet at the right height and location, typically 1.2 metres from the floor near where you will park.
For hardwired installations, they mount the charger bracket, run the wire into the charger's junction box, and make the final connections.
- Testing: The electrician turns the main breaker back on, tests the new circuit with a multimeter to verify proper voltage (240V) and grounding, and confirms the charger powers up. They will verify the circuit draws the correct amperage and that GFCI protection is functioning.
A typical installation takes 2-4 hours. Complex jobs (long wiring runs, panel upgrades, trenching for detached garages) can take a full day or even two days.
Step 5: Inspection
The local electrical safety authority inspects the work. This is usually scheduled 1-2 weeks after installation. The inspector verifies the wiring, breaker, grounding, and charger meet code requirements. In most provinces, the inspection is mandatory and tied to your permit. The inspector will check:
- Correct wire gauge for the circuit amperage
- Proper breaker rating (125% of continuous charger load per CEC)
- Adequate grounding and bonding
- Code-compliant conduit and connectors
- Correct outlet type (for plug-in installations)
- Charger mounting is secure and accessible
- GFCI protection where required
If the inspection passes, and it will, if you hired a competent electrician, you receive a certificate of inspection. Keep this document with your home records; you will need it if you sell your home or make an insurance claim.
Step 6: Plug In and Charge
Set up any smart features (scheduling, energy monitoring) via the charger's app. Program the charger to charge during off-peak hours if your province has time-of-use pricing, in Ontario, this means setting it to start at 7 PM and finish by 7 AM. Connect it to your home Wi-Fi. And that is it. You are done. Every night from now on, you plug in when you get home, and you wake up to a full battery. No more gas stations. No more fuel price anxiety. Just plug in and go.
PANEL UPGRADES, THE FULL PICTURE
If your home has a 100-amp panel, you will likely need an upgrade to 200 amps to safely add a Level 2 charger. This costs $1,500-$3,000 and adds a day to the installation timeline. It involves replacing the main breaker panel and potentially upgrading the service entrance from the utility.
The process works like this: your electrician orders the new 200-amp panel and coordinates with your utility (BC Hydro, Hydro-Quebec, Toronto Hydro, etc.) to temporarily disconnect and reconnect your service. On upgrade day, the electrician replaces the old panel with the new one, transfers all existing circuits, adds the new EV charger circuit, and reconnects. The utility verifies the service entrance meets their requirements. Total downtime for your home is typically 4-8 hours.
The utility coordination is the part most people do not anticipate. BC Hydro typically schedules service upgrades within 2-4 weeks. Toronto Hydro and Hydro-Quebec have similar timelines. Factor this into your planning, a panel upgrade is not a same-week project.
Homes with 150-amp panels are a grey area. Your electrician will calculate the total load using CEC demand factors. If the numbers are close, a load management device often bridges the gap without requiring a full upgrade. Homes with 200-amp panels almost always have enough capacity.
An alternative to a panel upgrade is a load management device (sometimes called a "share2" or "EV load manager"). These devices monitor your panel's total load and temporarily reduce the charger's power when other high-draw appliances are running. They cost $200-$400 and can save you from a $2,000+ panel upgrade. Ask your electrician about this option, it is one of the smartest ways to avoid an expensive upgrade that you may not actually need.
If you are upgrading from 100A to 200A anyway, treat it as an investment. A 200-amp panel accommodates a Level 2 charger, a heat pump, an induction stove, and a second EV. Homes with 200-amp service sell faster and for more money.

COSTS BY SCENARIO
The total cost of a Level 2 charger installation depends on four variables: the charger itself, the wiring run length, your panel's capacity, and your province's labour rates. Here are four realistic scenarios that cover the range.
Best case, $1,000-$1,200 total. You have a 200-amp panel in your attached garage. The charger mounts on the wall opposite the panel, requiring a 3-5 metre wiring run. You buy a Grizzl-E Classic ($500) or similar basic charger. Installation costs $500-$700 for the breaker, wiring, outlet, and permit. This scenario covers roughly 40% of Canadian homeowners with newer homes and attached garages. It is the simplest, fastest installation, your electrician is in and out in 2 hours.
Typical case, $1,500-$2,000 total. You have a 200-amp panel, but it is in the basement and the charger goes in the attached garage. The wiring run is 10-15 metres through the basement ceiling and up through the garage wall. You buy a ChargePoint Home Flex ($700-$800) or Grizzl-E Smart ($650). Installation costs $800-$1,200. This is the most common scenario, 3-4 hours of work and the category most Canadian homeowners fall into.
Complex case, $2,500-$3,500 total. You have a 200-amp panel, but you park in a detached garage 15-20 metres from the house. The electrician runs conduit along the exterior, possibly underground in a trench, and into the detached structure. You buy a weather-rated charger ($600-$800). Installation costs $1,500-$2,500 because of the exterior conduit run, trenching, and additional materials. This scenario adds a full day of labour and may require a separate inspection for the underground wiring.
Panel upgrade case, $3,500-$5,500 total. You have a 100-amp panel that needs upgrading to 200 amps. The charger costs $600-$800. The panel upgrade costs $1,500-$3,000, and the charger circuit installation adds another $500-$1,000. This is the most expensive scenario, but it is also an investment, a 200-amp panel increases your home's capacity for future needs and adds value at resale.
Note: The federal EVAP rebate ($5,000) is for vehicle purchases, not charger installation. Some provinces and utilities offer separate rebates for home charger installation, see the provincial rebates section below.
TOP CHARGER RECOMMENDATIONS FOR CANADA
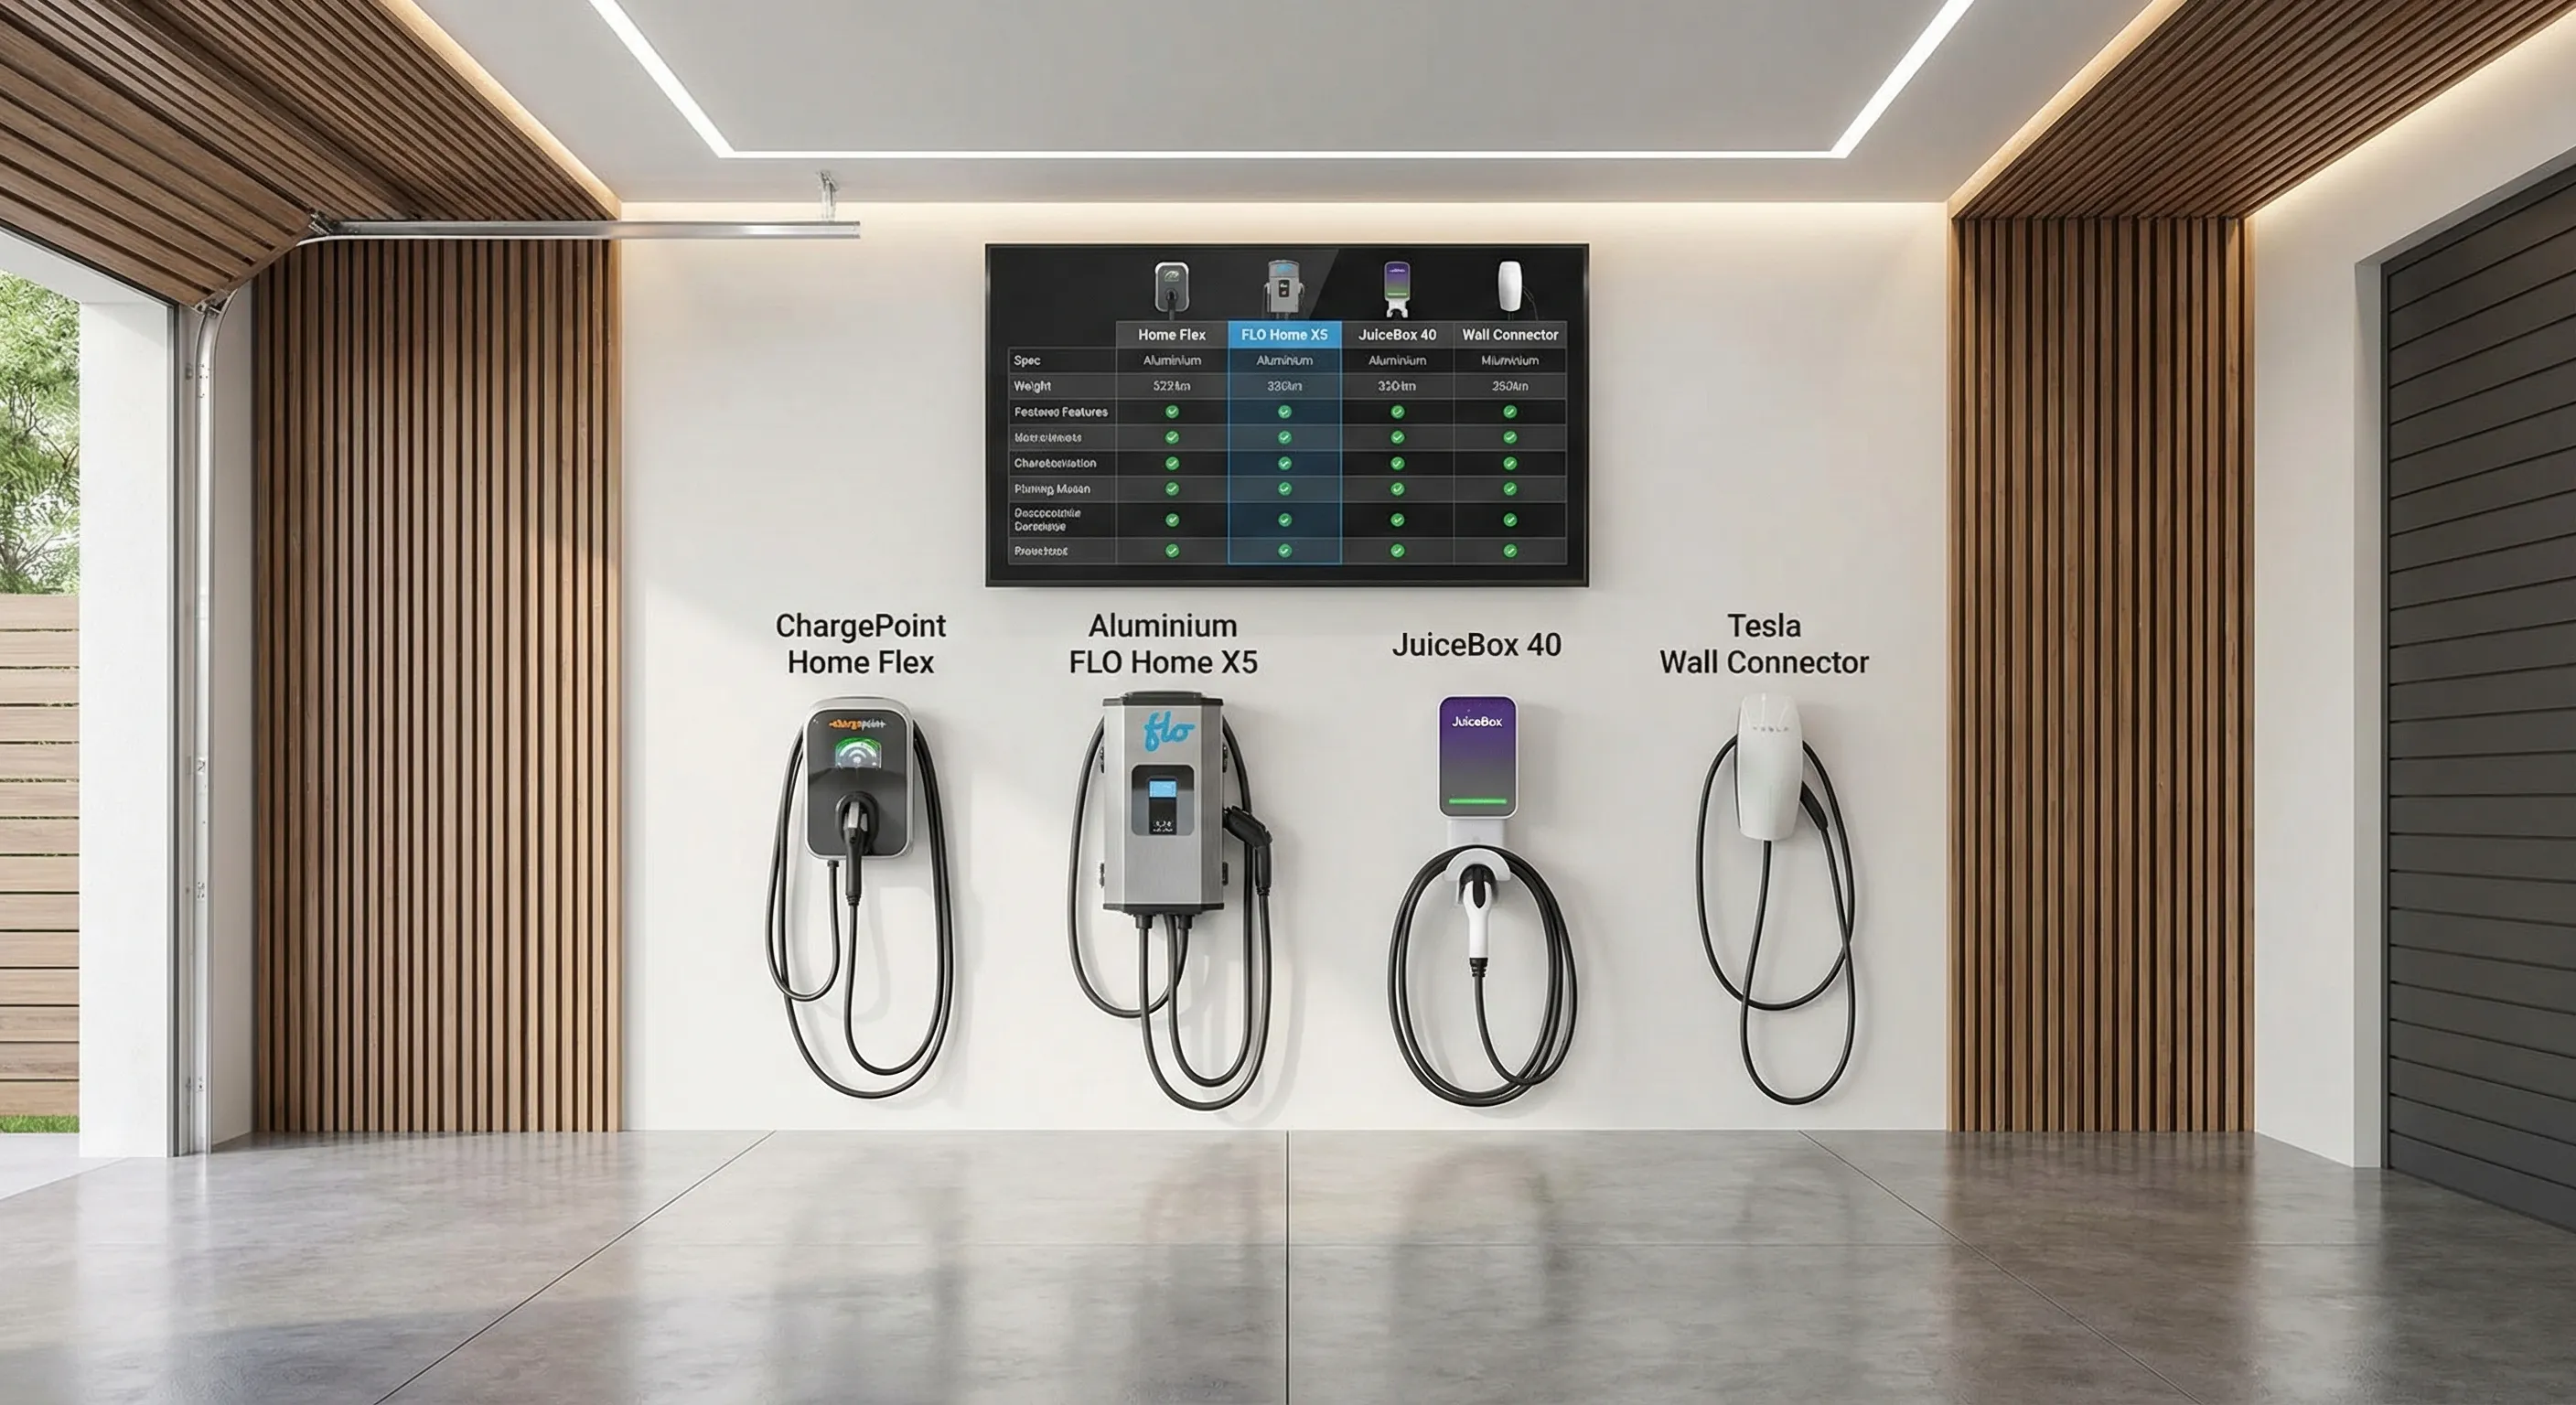
Choosing a charger is not complicated. You need something rated for Canadian cold, with enough amperage to charge overnight, a cable long enough to reach your car, and a warranty from a company that will still exist in three years. Here are the chargers that meet all four criteria.
Grizzl-E Classic, Best Overall ($499-$550 CAD). Canadian-made in Kitchener, Ontario. 40 amps (9.6 kW), NEMA 14-50 plug-in or hardwired, 24-foot cable, rated to -30C, NEMA 4 weatherproof enclosure. No smart features, just a charger that works every single time. The 5-year warranty is the best in the category. This is the charger we recommend to most buyers. The Grizzl-E Smart ($649) adds Wi-Fi, app scheduling, and energy monitoring. For two-EV households, the Grizzl-E Duo ($849) provides two charging cables on a single circuit.
ChargePoint Home Flex, Best Smart Charger ($700-$800 CAD). Adjustable from 16A to 50A (up to 12 kW), so it works on circuits from 20A to 60A breakers. If you move to a home with a smaller panel, you dial down the amperage rather than buying a new charger. The ChargePoint app is the best in the category, scheduling, energy tracking, reminders, and charging history export for tax purposes. If you are on Ontario's time-of-use pricing, the scheduling feature alone can save $200-$400 per year. 23-foot cable, rated to -30C, 3-year warranty.
Tesla Wall Connector, Best for Tesla Owners ($550-$650 CAD). If you drive a Tesla, the Wall Connector integrates smoothly with your vehicle. Up to 48 amps (11.5 kW), Wi-Fi enabled, and it communicates directly with your Tesla for optimized scheduling and preconditioning. 24-foot cable, rated to -30C. It uses the NACS connector natively, no adapter needed for Tesla vehicles. For non-Tesla owners, there is no advantage over the Grizzl-E or ChargePoint. The Wall Connector also supports power sharing between up to six units on a single circuit, useful for multi-Tesla households.
Emporia Energy Smart Charger, Best Value ($449-$499 CAD). 48 amps (11.5 kW) with Wi-Fi, app scheduling, and energy monitoring at a price that undercuts the competition. 24-foot cable, rated to -30C, NEMA 14-50 plug-in or hardwired. The trade-off is build quality, it feels lighter than the Grizzl-E, and the app occasionally has connectivity issues. For budget-conscious buyers who still want smart features, it is hard to beat.
For a detailed comparison of all the top chargers with pricing, specs, and cold-weather ratings, see our Best Level 2 EV Chargers Canada 2026 ranking.
SMART CHARGER FEATURES AND BENEFITS
A "smart" charger connects to your home Wi-Fi and offers app-based control. Some of these features are genuinely useful; others are marketing fluff. Here is what actually matters and what you can safely ignore.
Scheduled charging is the single most valuable smart feature. It lets you set the charger to only run during off-peak electricity hours. In Ontario, where time-of-use pricing drops to $0.076/kWh overnight (compared to $0.182/kWh on-peak), this can cut your charging costs by more than half. Over a year of charging a typical EV that drives 20,000 km, that is $300-$400 in savings. The charger pays for the "smart" premium in 1-2 years. Even in provinces without time-of-use rates, some utilities offer lower overnight rates, check your utility's rate schedule.
Energy monitoring tracks how much electricity your charger uses per session, per day, per month, and cumulatively. Useful for tracking costs if you charge a company vehicle at home and claim it as a business expense, understanding your actual consumption for budgeting, and verifying your utility bill. Some chargers export this data to CSV for your accountant.
Load management and power sharing is increasingly important as households add second EVs, heat pumps, and other high-draw appliances. Chargers with built-in load management dynamically adjust their power draw based on what else is running in your house. Power sharing, where two chargers on the same circuit split the available amperage, is available on Grizzl-E Duo and Wallbox Pulsar Plus systems, halving the installation cost for two-EV households.
Wi-Fi connectivity and firmware updates keep your charger current with new features, bug fixes, and security patches. Over a 10-year ownership period, firmware updates extend the useful life of your charger significantly.
Remote monitoring lets you check charging status from your phone, whether the car is plugged in, how much charge it has received, and when it will finish. Not essential, but convenient on mornings when you want to confirm the car charged overnight.
Features you can ignore: RGB status lights, voice assistant integration, "AI-powered" charging optimization, and anything described as "revolutionary." Smart scheduling and energy monitoring are valuable. Load management pays for itself. Everything else is noise.
PERMITS AND INSPECTIONS BY PROVINCE
Every province requires an electrical permit for installing a 240V circuit. The specifics vary, but the process is similar everywhere: your electrician applies for the permit, does the work, and an inspector verifies it meets code. Here is what to expect in each province.
British Columbia: The BC Safety Authority oversees electrical permits. Your electrician applies online or at a regional office. Permit costs $50-$100. Inspection is mandatory and typically scheduled within 1-2 weeks. BC requires compliance with the Canadian Electrical Code plus BC-specific amendments.
Alberta: Permits are handled by your local municipality's safety codes department. In Calgary and Edmonton, permits cost $75-$150. Rural areas may be administered by Safety Codes Council-accredited agencies. Inspection turnaround is typically 5-10 business days.
Ontario: The Electrical Safety Authority (ESA) manages all permits. Your electrician files a notification of work, and the ESA schedules an inspection. The permit/notification costs $75-$125. ESA inspectors are generally available within 1-2 weeks. The ESA website has an online portal where you can track your permit status.
Quebec: The Regie du batiment du Quebec (RBQ) oversees electrical work. Your electrician must hold an RBQ licence, verify this before hiring. Permit costs $50-$100. Inspections are mandatory for all 240V circuit installations.
Manitoba, Saskatchewan, and Atlantic provinces: Permits are handled by provincial or municipal safety authorities. Costs range from $50-$150. Turnaround times vary, urban areas are faster (1 week), rural areas can take 2-3 weeks.
Permit essentials: Never skip the permit. It costs $50-$150 and takes your electrician 15 minutes to apply. It gives you legal proof that your installation is safe and code-compliant. It protects your home insurance. And if you ever sell your home, a permitted EV charger installation is a selling point, not a liability.
CONDO, APARTMENT, AND RENTAL CHARGING SOLUTIONS
Not everyone lives in a detached house with a garage. If you are in a condo, apartment, or rental, installing a charger is more complex, but increasingly, legislation is on your side.
Right-to-Charge Legislation
Several provinces have enacted or are developing "right to charge" legislation that prevents condo boards and strata councils from unreasonably blocking EV charger installations. This legislation is significant for EV adoption in urban centres where multi-unit housing is the norm.
British Columbia passed the Strata Property Amendment Act, which prevents strata corporations from unreasonably refusing an owner's request to install EV charging equipment. The owner typically pays for the installation, and the strata council can set reasonable conditions (licensed electrician, insurance, metering) but cannot issue a blanket refusal. This is the strongest right-to-charge legislation in Canada and has been in effect since 2023.
Ontario has the Promoting Green Energy Act provisions and condominium act amendments that support EV charger installations. While not as explicit as BC's legislation, Ontario's framework makes it difficult for condo boards to refuse without a legitimate safety or infrastructure reason. If your condo board pushes back, reference the Ontario Condominium Act provisions and request their refusal in writing with specific reasons, vague objections do not hold up.
Quebec has provisions under the Regie du batiment and condominium law that support EV charger installation in multi-unit buildings. Quebec's strong provincial EV rebate programme ($7,000 for new EVs plus up to $600 for home charger installation) has created significant demand for MURB charging, and the legislative framework has evolved to support it.
Practical Options for Multi-Unit Buildings
Dedicated charger at your parking spot: This is the ideal setup. You pay for a Level 2 charger and installation from your building's electrical room to your designated parking space. Costs are typically $2,000-$5,000 due to longer conduit runs through parking structures. A dedicated meter or sub-meter ($200-$400) ensures you pay for your own electricity and removes the building's objection about shared costs.
Shared charging stations: Some condo boards install shared Level 2 chargers in the parking garage, available to all residents on a first-come or reservation basis. The building pays for installation, and residents pay per-kWh through a network like FLO or ChargePoint. This is the most cost-effective approach for buildings where only a few residents have EVs.
Portable charger with existing outlet: If your parking space has access to a standard 120V outlet (many underground garages do), you can use a portable charger, though it only delivers Level 1 speeds (5-8 km of range per hour) unless you can get a 240V outlet installed. Always get building management approval before plugging into any building outlet.
Rental Properties
If you rent, your options are more limited but not nonexistent. Start by talking to your landlord, some are willing to install a NEMA 14-50 outlet, especially if you offer to share the cost or sign a longer lease. A 240V outlet is a permanent improvement to the property that benefits future tenants. Frame it as a property upgrade, not a personal request. The cost for the landlord is typically $500-$1,000.
In provinces with right-to-charge legislation, renters may have legal grounds to request installation, though the specifics are still evolving. BC's legislation applies to strata properties (condos) but not all rental situations. Ontario's framework is similarly focused on condominiums.
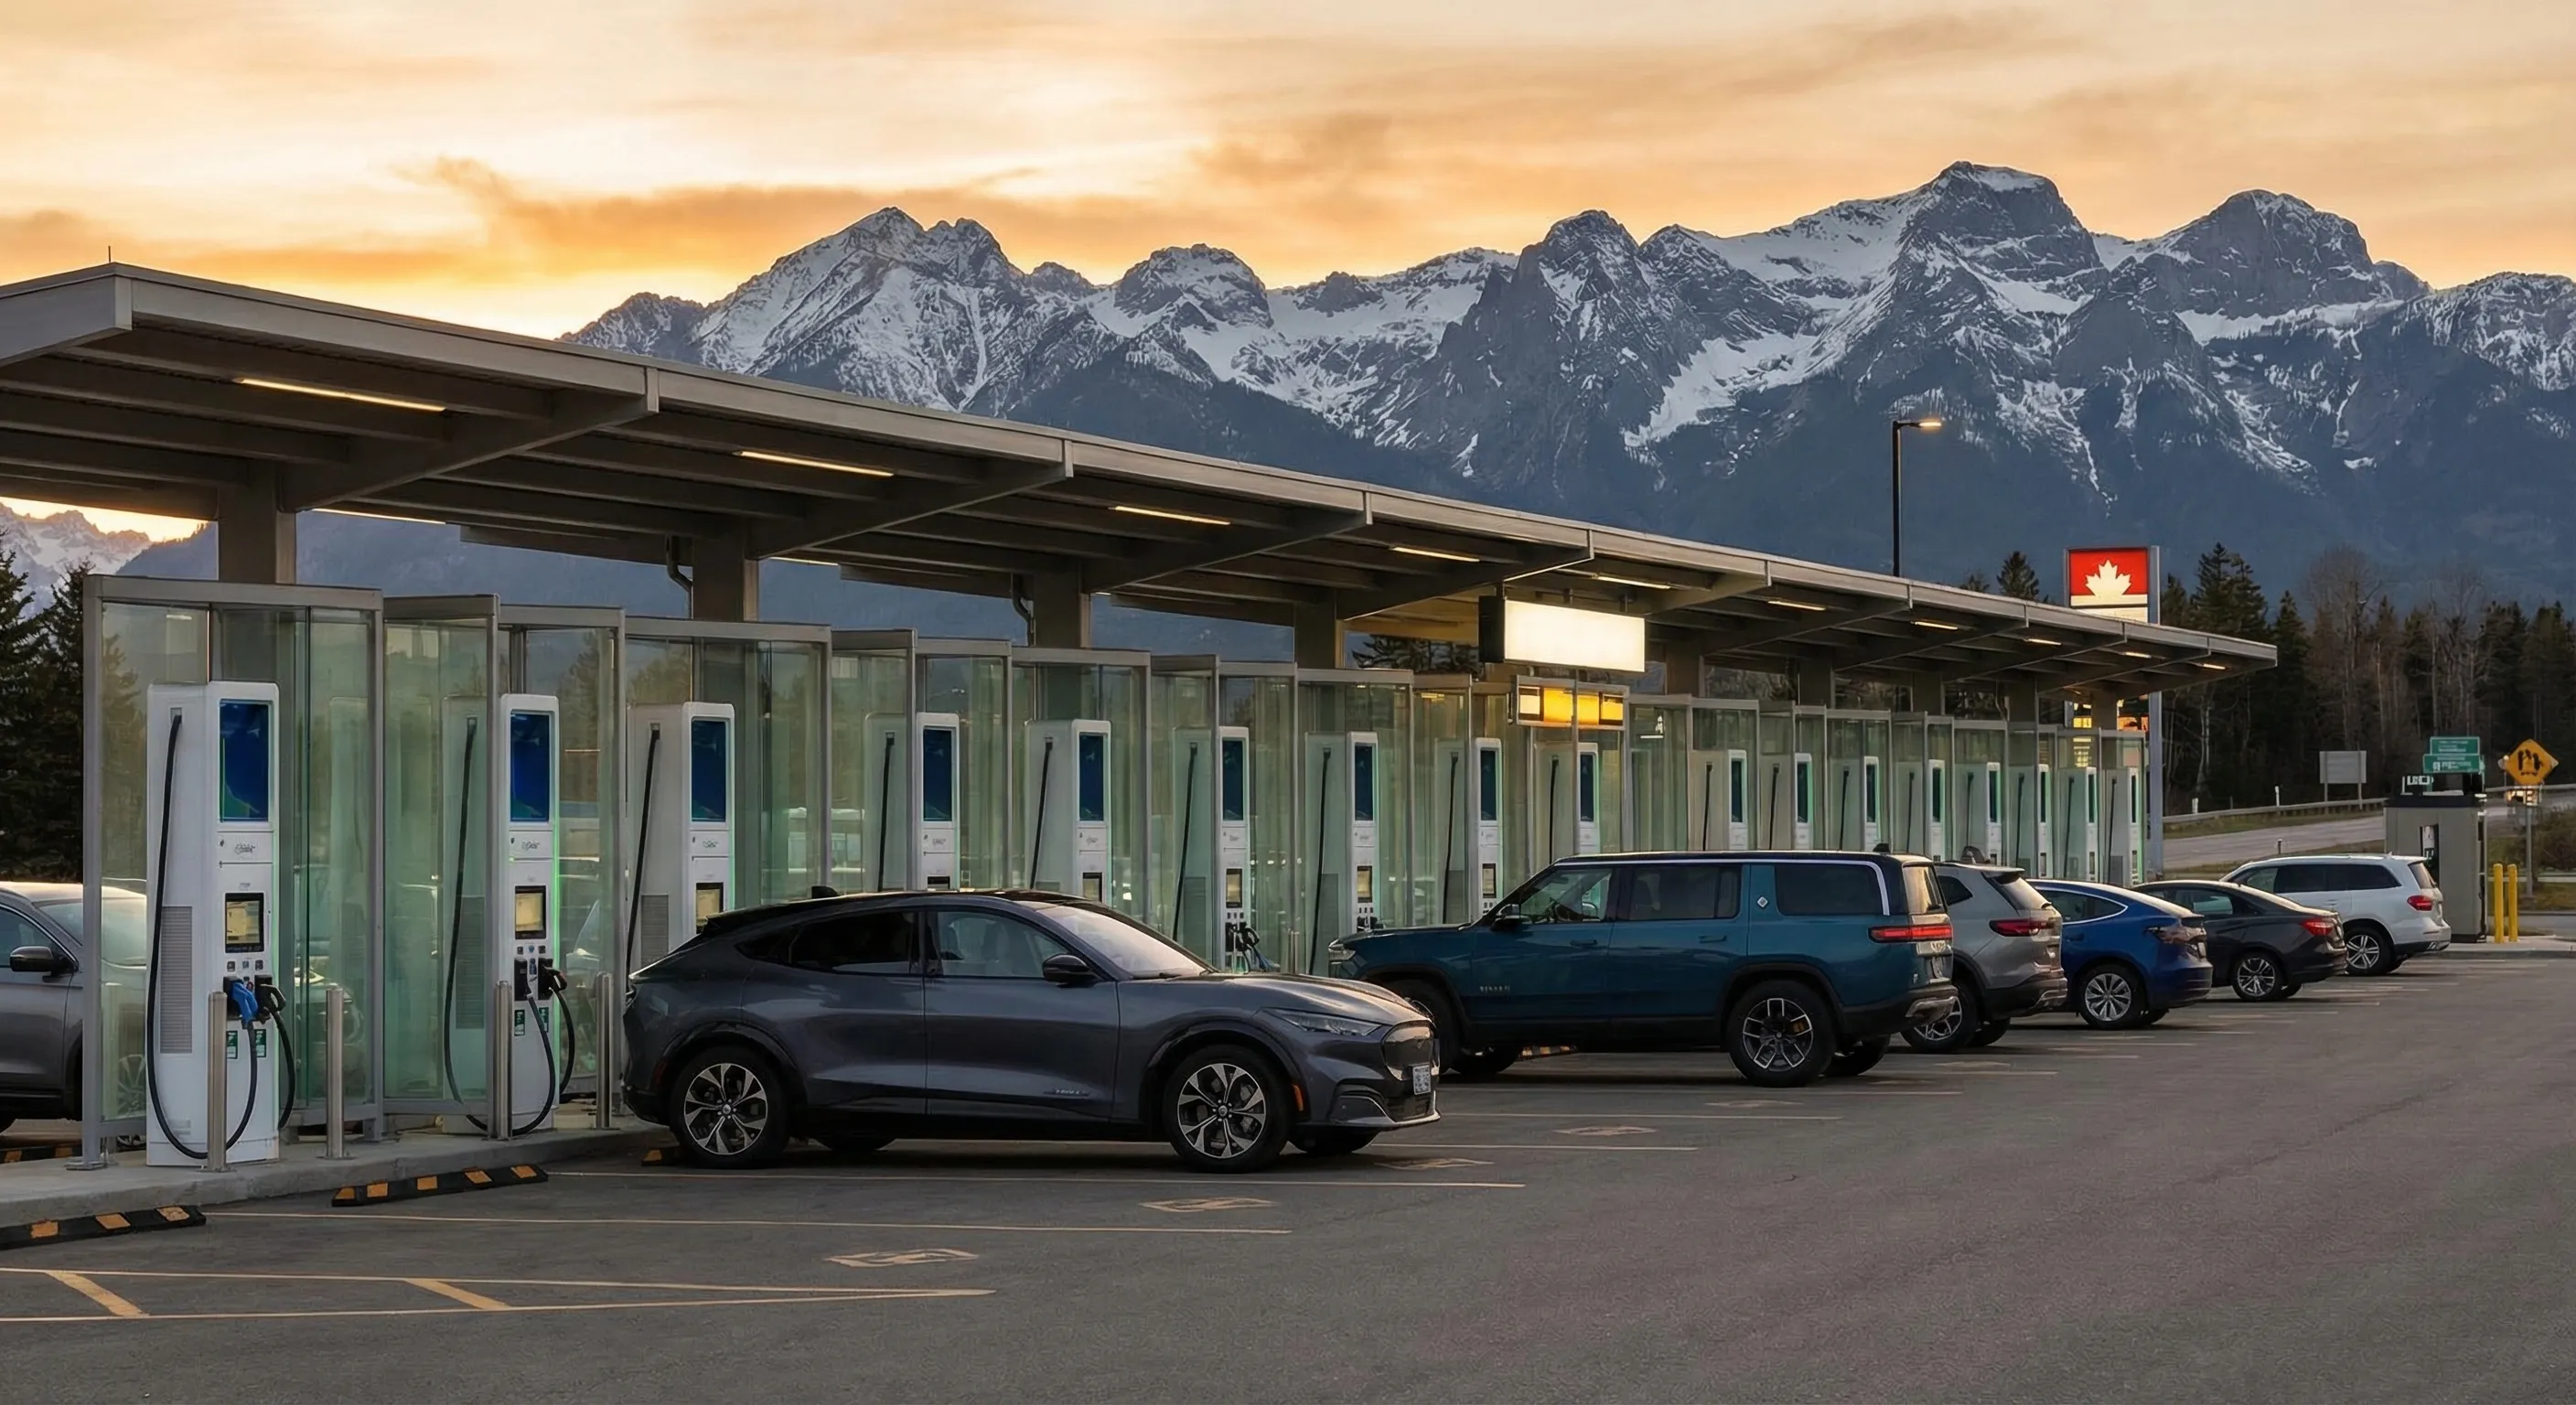
If your landlord will not cooperate, a portable Level 1 charger (plugging into a standard 120V outlet) is your fallback. It is slow, 5-8 km per hour, but if you drive less than 50 km per day, an overnight Level 1 charge covers your needs. Supplement with occasional public Level 2 charging at workplaces or shopping centres, the FLO network is extensive in most Canadian cities.
OUTDOOR INSTALLATION CONSIDERATIONS
Not every charger lives in a cozy garage. If your parking is outdoors, driveway, carport, or alongside your house, the installation needs to account for weather, and in Canada, that means serious weather.
NEMA Ratings That Matter
Chargers are rated for weather resistance using the NEMA (National Electrical Manufacturers Association) system. Do not install a charger outdoors without checking this rating first:
- NEMA 3R: Rated for outdoor use, protected against rain, sleet, and ice. This is the minimum for outdoor installation. Adequate for covered carports and sheltered locations.
- NEMA 4: Rated for outdoor use, protected against rain, sleet, ice, splashing water, and hose-directed water. This is the standard for serious outdoor installations where the charger is fully exposed to the elements.
- NEMA 4X: Same as NEMA 4 plus corrosion resistance. Useful in coastal areas (Halifax, Victoria, Vancouver Island) or regions with heavy road salt exposure (most of Ontario and Quebec).
The Grizzl-E Classic carries a NEMA 4 rating, which means it handles anything a Canadian winter throws at it, rain, snow, ice, wind-driven sleet, all of it. The ChargePoint Home Flex is also rated for outdoor installation. If you buy a charger without checking its NEMA rating, you may end up with an indoor-only unit that fails the first time it rains or, worse, creates a safety hazard.
Protecting the Installation
Beyond the charger itself, outdoor installations need additional protection:
- Conduit protection: All exterior wiring must be in weatherproof conduit. Your electrician will use rigid or liquid-tight flexible conduit rated for outdoor use. This adds $100-$300 to the installation cost depending on the run length.
- Cable management: The charging cable hangs from the charger or sits in a cable holder when not in use. In winter, a wet cable can freeze to the ground or get buried in snow.
Mount a cable hook or retractor to keep the cable off the ground. Most chargers include a basic cable holder, but aftermarket cable management systems ($30-$50) are sturdier and keep the cable cleaner.
- Snow and ice clearance: Mount the charger at a height where it will not be buried by snowbank buildup from ploughing. A height of 1.2-1.5 metres from the ground is standard, but if you get heavy snowfall (Northern Ontario, Quebec, BC interior), consider mounting higher.
Ensure the outlet or connector face is angled downward or protected by a cover to prevent ice accumulation.
- Ground fault protection: All outdoor 240V circuits require GFCI (Ground Fault Circuit Interrupter) protection per the Canadian Electrical Code. Most modern EV chargers have built-in GFCI, but your electrician should verify this and add panel-level GFCI if the charger does not include it.
GFCI trips instantly if it detects a current leak, critical for outdoor installations where moisture exposure is constant.
- Dedicated post mounting: If there is no wall near your parking spot, the charger can be mounted on a dedicated post or pedestal. Purpose-built EV charger pedestals cost $150-$300 and provide a clean, secure mounting surface with built-in cable management.
Alternatively, your electrician can mount a treated 6x6 post in concrete, functional if not elegant. Either way, ensure the post is deep enough to withstand wind and snow loading.
Cold Weather Performance
All the chargers recommended in this guide are rated to -30C or colder, which covers the vast majority of Canadian conditions. At extreme cold temperatures, you may notice:
- Slightly slower initial charging: The charger and cable are fine, but your EV's battery management system may limit charge speed until the battery warms up. This is the car's behaviour, not the charger's. On most EVs, the battery warms within 15-30 minutes of plugging in and charging speed normalizes.
- Stiffer cables: Charging cables become less flexible below -20C.
This is normal and does not affect performance, but it makes plugging in slightly more awkward. Silicone-jacketed cables (used by Grizzl-E and others) remain more flexible in cold than standard PVC-jacketed cables.
- Ice on the connector: If freezing rain coats the connector, it can be difficult to plug in. Keep the connector in its holster or cover when not in use. A light tap to break the ice is usually sufficient. Never use hot water to de-ice the connector.
LOAD MANAGEMENT FOR MULTI-EV HOUSEHOLDS
Households with two or more EVs face a specific challenge: running two 40-amp charger circuits simultaneously draws 80 amps, which on a 200-amp panel leaves only 120 amps for everything else in the house. That may be fine, or it may be tight, depending on your other loads. Three EVs and you are definitely looking at a panel upgrade or load management.
Power Sharing
The most elegant solution is power sharing between two chargers. Several manufacturers offer this:
- Grizzl-E Duo: A single unit with two charging cables that shares one 40-amp circuit. When both cars are plugged in, each gets 20 amps (4.8 kW). When only one car is plugged in, it gets the full 40 amps. You install one circuit, one breaker, one set of wiring, and charge two cars. Total cost is roughly $800-$900 for the charger plus standard installation costs.
This is the simplest, most cost-effective solution for two-EV households.
- Tesla Wall Connector Power Sharing: Up to six Tesla Wall Connectors can share a single circuit, dynamically splitting the available amperage. For a household with two or three Teslas, this is the ideal setup, one circuit installation, multiple chargers, intelligent load distribution.
- Wallbox Power Sharing: Two Wallbox Pulsar Plus units can be configured to share one circuit, dynamically splitting the available amperage based on each vehicle's needs and state of charge.
- ChargePoint Load Management: ChargePoint offers a load management solution for multiple Home Flex units that distributes available power across chargers based on real-time demand.
Power sharing works well when both cars are plugged in overnight. Each car charges at a reduced rate, but over an 8-10 hour overnight window, both cars still receive a substantial charge. A car receiving 20 amps (4.8 kW) for 10 hours gets 48 kWh of energy, enough for approximately 300 km of range. For most households, that is more than adequate for daily driving.
Whole-Home Load Management
For households that want maximum flexibility, a whole-home energy management system monitors all electrical circuits and dynamically allocates capacity. When your dryer runs, the charger throttles down. When the dryer stops, the charger ramps up. When both cars are plugged in but the A/C is running, the system prioritizes based on your preferences, perhaps one car charges at full speed and the other waits until the A/C cycles off.
Products like the Span smart panel, Emporia energy management system, and Schneider Electric's EV Link offer various levels of this capability. These systems cost $500-$2,000 installed but can eliminate the need for a panel upgrade while supporting multiple EVs, heat pumps, and other high-draw loads on existing 200-amp service.
As electrification accelerates, EVs, heat pumps, induction stoves, whole-home load management is becoming less of a luxury and more of a necessity.
PROVINCIAL REBATES FOR CHARGER INSTALLATION
Several provinces and utilities offer rebates specifically for home EV charger installation. These are separate from vehicle purchase rebates and can significantly reduce your out-of-pocket cost.
British Columbia, BC Hydro CleanBC Go Electric Program: Up to $350 rebate for eligible Level 2 charger installation. The rebate covers both the charger purchase and installation costs. You must use a charger on BC Hydro's eligible products list and have the work done by a licensed electrician. FortisBC customers in the BC interior may also have access to similar programmes. Check BC Hydro's website for current availability, these programmes are funded in cycles and sometimes pause when funding runs out.
Quebec, Roulez vert Programme: Up to $600 rebate for home charging station installation. This is one of the most generous charger rebates in Canada and applies to both the charger purchase and installation labour. Combined with Quebec's already-low electricity rates, this makes home charging in Quebec extraordinarily affordable. The rebate is available to homeowners, condo owners, and tenants (with landlord permission). Factor the $600 rebate against a typical $1,500 installation and your net cost drops to $900.
Ontario: No province-wide charger installation rebate as of 2026, but some municipalities and utilities offer local programmes. Alectra Utilities, Toronto Hydro, and other local distributors have periodically offered rebates or incentives for home charger installation. Check your specific utility's website. Ontario's focus has shifted toward MURB (multi-unit residential building) charging infrastructure funding rather than single-family home rebates.
Nova Scotia, Efficiency Nova Scotia: Has offered rebates of up to $500 for home EV charger installation in previous programme cycles. Availability varies, check the Efficiency Nova Scotia website for current programmes.
Other provinces: Alberta, Saskatchewan, Manitoba, New Brunswick, PEI, and Newfoundland do not currently offer province-wide home charger installation rebates. Some municipalities and local utilities within these provinces may have pilot programmes. NRCan's Zero Emission Vehicle Infrastructure Program (ZEVIP) has also funded charger installations at workplaces and multi-unit buildings, though it does not directly cover single-family homes.
For the latest on provincial vehicle rebates, which can offset the overall cost of EV ownership including your charger, see our EV Rebates by Province Canada 2026 guide.
ELECTRICIAN HIRING TIPS
A Level 2 charger installation is only as good as the electrician who does the work. Here is how to find a good one and avoid the bad ones.
Get at least three quotes. Prices for the same job can vary by 50% between electricians. This is not because one is ripping you off, electricians have different overhead costs, experience levels, and ideas about the optimal wiring route. Three quotes give you a reliable baseline.
Ask specifically about EV charger installation experience. An electrician who has installed 50 EV chargers knows the common pitfalls, the optimal wiring routes, and the local permit process inside out. One who has never installed one will figure it out, but they may take longer and miss issues an experienced installer would catch immediately. In 2026, most urban electricians have done at least a few EV charger jobs.
Verify licensing and insurance. Every province requires electricians to hold a valid journeyman or master electrician licence. Ask for their licence number and verify it with your provincial regulatory body. Ensure they carry liability insurance and WorkSafe/WSIB coverage. If an unlicensed electrician does the work and something goes wrong, your home insurance will not cover the damage.
Ask who pulls the permit. The electrician should pull the permit and schedule the inspection. If they suggest skipping the permit to save money, find a different electrician immediately. This is a red flag for someone who cuts other corners too.
Get a written quote with a breakdown. The quote should itemize: materials (wire, conduit, breaker, outlet or junction box), labour (hours and hourly rate or fixed price), permit fee, and any additional costs (panel upgrade, trenching, sub-panel). A one-line quote that just says "$1,500" tells you nothing and makes it impossible to compare with other quotes.
Check reviews and references. Google reviews, HomeStars, and word-of-mouth recommendations from other EV owners are all valuable. Local EV owner groups on Facebook often have recommended electrician lists specific to your city.
Timeline expectations: From initial quote to finished installation, expect 1-3 weeks in most Canadian cities. The electrician needs 2-5 business days to schedule the job, the work itself takes 2-8 hours, and the inspection happens 1-2 weeks later. In busy markets (Toronto, Vancouver), timelines can stretch to 4-6 weeks. Start the electrician search the same week you order your vehicle.
A Level 2 Home Charger Pays For Itself In Year One
A Level 2 home charger is the single best investment you can make as an EV owner. It turns charging from a chore into a non-event, plug in when you get home, full battery by morning, never think about it again. The cost is $1,000-$3,500 depending on your home's electrical setup, and most installations fall in the $1,500-$2,000 range. Over five years of EV ownership, you will save $10,000-$12,000 in fuel costs compared to gasoline, your charger installation pays for itself in the first year.
Get an electrician's assessment first. That single step tells you everything: what your panel can handle, what route the wiring takes, and what the total cost will be. From there, buy a charger rated for Canadian conditions (Grizzl-E, ChargePoint, Tesla Wall Connector, or Emporia), pull a permit, get it installed, and start saving money every single night while you sleep.
Most EVs charge from near-empty to full in 7-12 hours on a Level 2 charger. A 40-amp charger delivering 9.6 kW handles a 60 kWh battery in about 6-7 hours. A 48-amp charger at 11.5 kW does it in under 5. Home charging is not just convenient, it is how EV ownership becomes effortless.
To understand exactly how much you will save on charging compared to gas, check our EV Charging Costs by Province Canada 2026 breakdown. And if you are still deciding whether an EV makes financial sense, our Switching from Gas to EV Canada 2026 Guide has the full cost analysis.
Gear worth having
As an Amazon Associate, ThinkEV earns a small commission from qualifying purchases — at no extra cost to you.

TP-Link Kasa Smart Plug with Energy Monitoring
Track exactly how much electricity your Level 1 charger uses and schedule it for off-peak hours. Know your real cost per kWh.
As an Amazon Associate, ThinkEV earns from qualifying purchases — at no extra cost to you.
Related Reading
- Best Level 2 EV Chargers Canada 2026, Our complete guide to the best home chargers for Canadian conditions.
- Best Level 2 EV Chargers Ranked Canada 2026, Our top charger picks ranked and compared with specs and pricing.
- EV Charging Costs by Province Canada 2026, What you will actually pay to charge at home in every province.
- Switching from Gas to EV Canada 2026 Guide, The complete transition guide with real cost comparisons.
- EV Rebates by Province Canada 2026, Every provincial and federal rebate for EV purchases and charger installation.
Gear worth having
As an Amazon Associate, ThinkEV earns a small commission from qualifying purchases — at no extra cost to you.

P3 Kill A Watt Electricity Usage Monitor
Plug in your charger and see exactly what you spend in kWh, cost, and watts. Settle the is-my-EV-really-cheaper debate with data.
As an Amazon Associate, ThinkEV earns from qualifying purchases — at no extra cost to you.

Founder & Chief Editor
Vlad Pereira is the founder and chief editor of ThinkEV.ca, based in Courtenay on Vancouver Island, British Columbia. He covers the global EV industry with a Canadian editorial lens — independent analysis, honest comparisons, and practical tools for drivers at every stage of the …
Frequently asked questions
Do I need a permit to install a Level 2 charger?
Can I install a Level 2 charger myself?
How long does a Level 2 charger take to fully charge an EV?
What if I live in a condo or apartment?
What is the difference between a 40-amp and 48-amp charger?
Can I charge the EV outdoors in Canadian winter?
Are there rebates for home charger installation in Canada?
What happens if my electrical panel is full?
Should I buy the charger or have my electrician supply it?
More EV & road-trip finds
Affordable upgrades worth a look — tap any to check the price on Amazon.
 ★ 17,839
Qifutan Vent Phone Mount (Military-Grade Clip)
View on Amazon ★ 8,681
Chemical Guys Complete Car Wash Kit
View on Amazon ★ 537
★ 537USB Star Projector Roof Light
View on Amazon ★ 4,055
6-Speed Manual Shift Knob Display
View on Amazon ★ 865
★ 865Collapsible Trunk Organizer
View on Amazon ★ 15,014
Spigen Tempered Glass for Tesla Model 3/Y
View on Amazon ★ 61
★ 61Toddler Car Seat Snack and Cup Tray
View on Amazon ★ 68
★ 68WeatherTech FloorLiner for Tesla Model 3
View on AmazonRead, Plan, Then Stay Current
Explore our expert articles to understand incentives and ownership costs, use the map to pressure-test charging reality, then subscribe so new EV coverage comes straight to you.
Continue Reading
Best Level 2 EV Charger Canada 2026: 7 Picks Tested for Cold Weather
Hidden Costs of EV Ownership Nobody Tells You

EV Maintenance Costs in Canada: What You Actually Pay (2026 Breakdown)

EV Charging Costs Canada 2026: Home vs Public by Province (Full Math)

How Much Will EVs Cost in Canada? The Complete Pricing Guide