Two EV chargers, one 60-amp breaker. When both cars plug in at the same time, what gauge wire does the install actually need, and where does the math start to break?
The short answer: run #4 AWG copper from the panel to a junction box, then #6 AWG copper out to each charger. Not #6 the whole way. The home-run conductor between the panel and the junction box has to be sized to the 60A breaker's full ceiling, and #6 doesn't quite get there once you account for conduit fill and a Canadian garage that hits 35°C in July. The Canadian Electrical Code is the primary reference here; the US National Electrical Code lands in the same place on the physics, which is why forum threads from US installers come to the same conclusion.
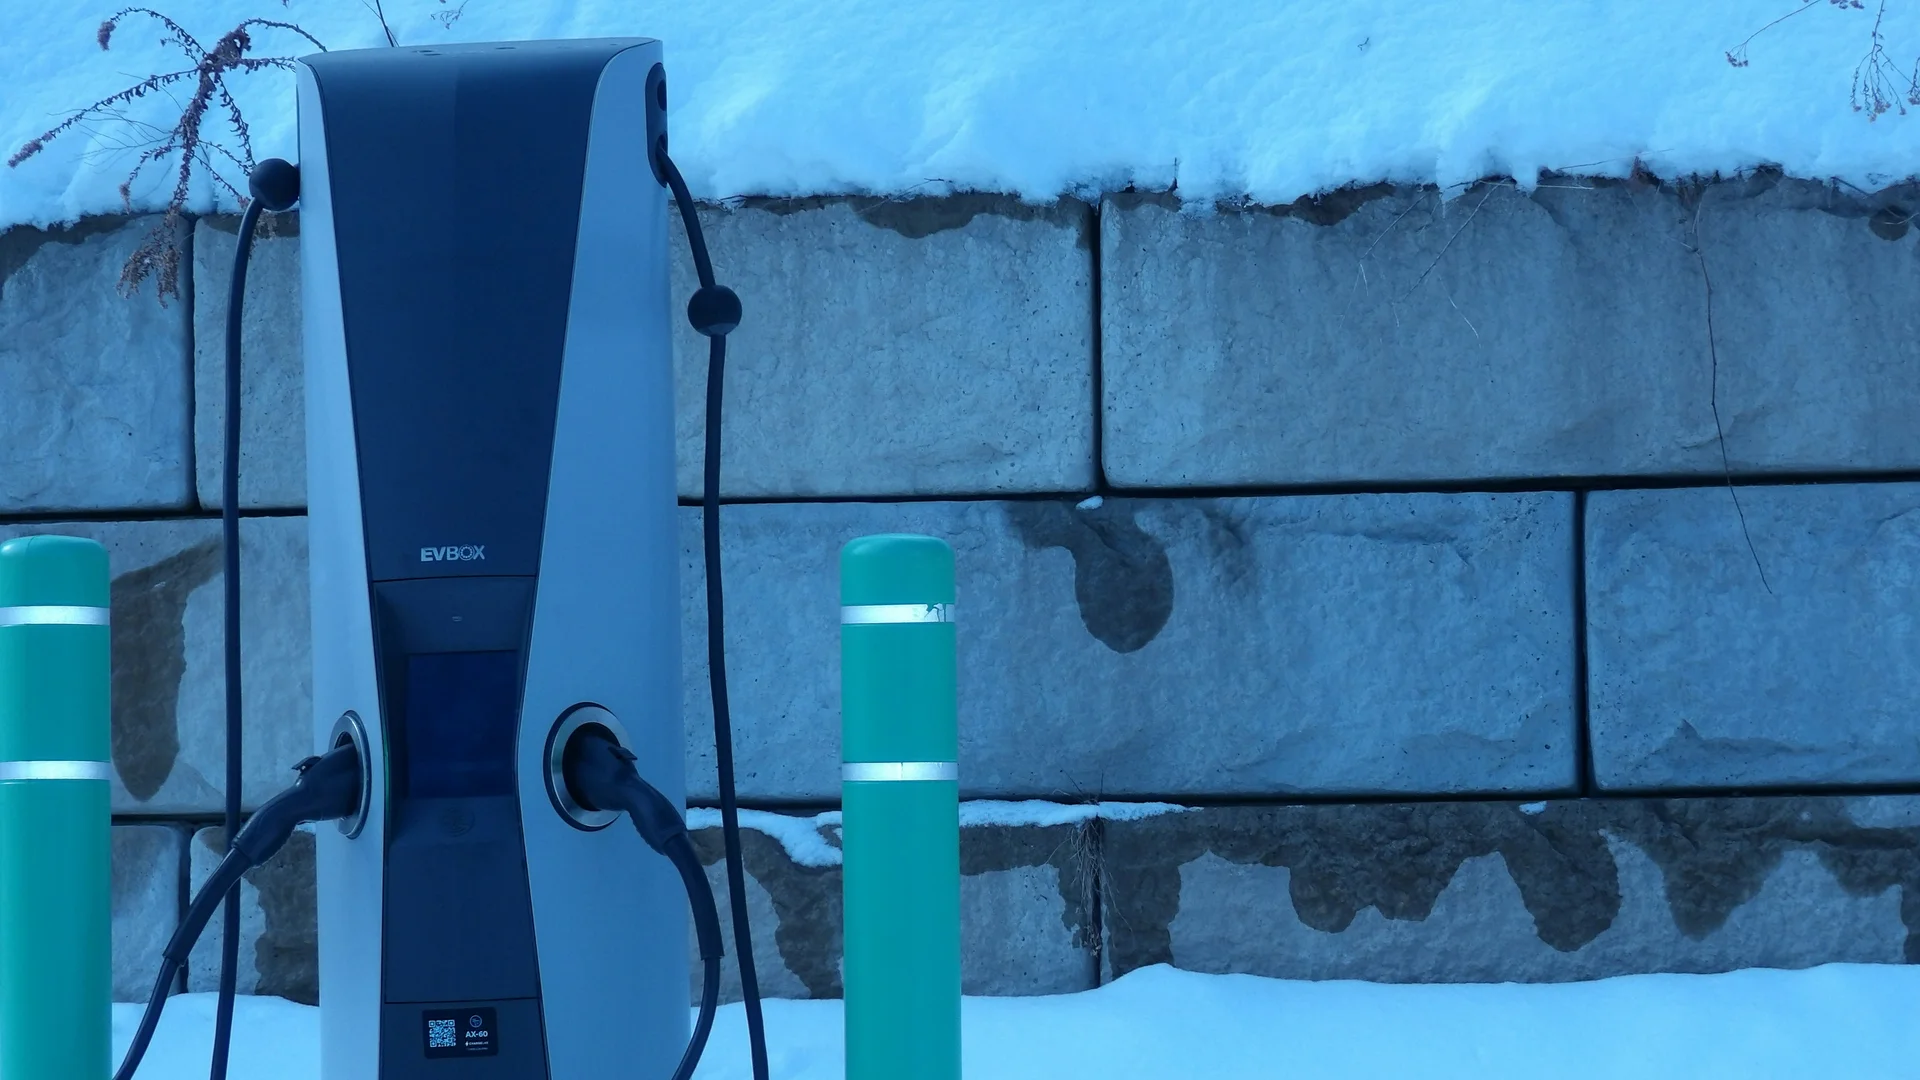
Two paired Emporia Pro 48A chargers are the worked example here, a common scenario across Canadian two-EV households, mapped against the geometry for a 6-foot run on one side of the garage and a 30-foot run on the other. The same logic applies to Grizzl-E Duo, ChargePoint Home Flex, Wallbox Pulsar Plus, or any dual-charger load-sharing setup sharing a single 60A circuit.
Key takeaways
- A 60A breaker requires #4 AWG copper for the panel-to-junction-box home run; #6 copper derated for a 38°C Canadian garage drops below 60A and is undersized.
- Two paired Emporia Pros share 48A total, not 48A each, NEC's 80% rule on a 60A breaker is fixed.
- EV chargers pull 48A continuously for 6–12 hours nightly, unlike a range or dryer that draws nameplate amperage for minutes, the thermal profile that kills the dryer-circuit comparison.
- Never accept #8 AWG on a 60A breaker, the NEC rates it at 40A maximum, period.
- Two cars rarely need simultaneous full-speed charging; 24A split overnight still delivers ~60 kWh per vehicle.
Gear worth having
As an Amazon Associate, ThinkEV earns a small commission from qualifying purchases — at no extra cost to you.

Lectron Level 2 J1772 Charger (40A, WiFi)
Smart WiFi charger with real-time energy monitoring. 40A / 9.6 kW, J1772 with a NEMA 14-50 plug, schedule charging right from your phone.
As an Amazon Associate, ThinkEV earns from qualifying purchases — at no extra cost to you.
Can Two 48A Chargers Actually Share One 60A Circuit?
Yes, and Emporia's own pre-purchase documentation is built around this exact configuration. The Pro supports up to 48A charging when connected to a 60A breaker, and the unit is designed to be paired with a second Pro so the two share that single 60A feed.
The arithmetic is fixed by the Canadian Electrical Code's 80% continuous-load rule (CEC rule 8-104), the same constraint shows up in the US National Electrical Code, which is why forum advice from US installers lands on the same numbers. A continuous load, anything drawing for three hours or more, which every EV session is, can only use 80% of the breaker's rating. Sixty amps times 0.8 equals 48 amps of sustained draw. That ceiling does not change because you added a second charger. It is the breaker's number.
What load sharing does is split that 48A intelligently between two units. When only one car is plugged in, that car gets the full 48A, 11.5 kW at 240V, around 50 km of range per hour. When both cars are plugged in, the firmware throttles each unit to roughly 24A so the combined draw never crosses 48A at the panel. Some load-sharing implementations are smarter than even-split: if one car is at 90% state of charge and tapering, the other gets the surplus.
The misconception to kill: "two 48A chargers on one 60A breaker" does NOT mean each charger gets 48A at the same time. It means the pair shares 48A. If you want both cars charging at full speed simultaneously, you need two separate 60A circuits, which means panel capacity, two breaker slots, and the wiring run doubled.
For most Canadian households, the shared circuit is the right call anyway. Two cars rarely need a full 48A overnight charge on the same night. An overnight session at 24A still delivers around 60 kWh, more than most daily commutes burn in a week. The pattern that wins is: plug both cars in at 6pm, let the firmware sort out who gets what, wake up with both at 100%. The single 60A circuit handles this cleanly.
The case against the shared circuit deserves a fair hearing. If both drivers are commercial, say one of you drives for Uber and the other does long-distance sales, and both routinely arrive home at 15% state of charge needing a full overnight refill, the shared circuit's split mode delivers about 5.8 kW per car overnight. That's roughly 55 kWh in a ten-hour window, enough for either driver alone, possibly tight for both on back-to-back high-mileage days. Concede the point: if your usage profile is that aggressive, the shared circuit is the wrong answer and you want two dedicated 60A feeds. For the 95% of two-car households where one car is the daily commuter and the other is a weekend vehicle, the shared circuit is genuinely the right answer.
This is the same logic behind shared-circuit dual chargers from other manufacturers, the Grizzl-E Duo runs the same playbook on a 40A circuit, splitting between two cars when both are plugged in. Emporia just does it at higher amperage. The same load-sharing pattern scales further at the commercial level, SWTCH's Energy Management System can reduce the effective electrical demand of a multi-stall installation by 40–60%, allowing a 100A circuit to support 10 chargers instead of 4. The residential two-Pro setup is the same dynamic at a smaller scale: oversubscribe the circuit, throttle in software, treat peak simultaneous demand as the rare event it actually is.
The Wire Math: What AWG Does a 60A Circuit Actually Need?
This is where the Reddit advice gets noisy and the code gets quiet. The code is right.
A 60A breaker requires conductors rated to carry 60A continuously. In the 75°C column, which is what residential breaker lugs are rated for, #8 copper tops out at 50A, #6 at 65A, and #4 at 85A. At first glance #6 looks fine, 65A is more than 60A. The trap is that the 65A rating assumes ideal conditions. Table 310.16 ampacities assume an ambient temperature of 30°C (86°F) and no more than three current-carrying conductors in a raceway or cable. If your installation exceeds these conditions (e.g., wiring in a hot attic or running multiple circuits in one conduit fill), you must apply adjustment factors found in NEC 310.15.
Canadian garages are not 30°C. A southwest-facing attached garage in Hamilton in August hits 38°C. Once you derate #6 for ambient temperature alone, the rating drops below 60A and the conductor is undersized for the breaker. The same #6 in conduit with a neutral pulled alongside is closer to 55A, and that's before you get to the NEC's own derating tables.
The counter-argument here, made loudly in every forum on the topic, is that #6 has worked for decades on 60A circuits in millions of homes and nothing has burned down. That's true and it's not a defence. It's worked because most 60A residential circuits historically fed electric ranges and dryers, appliances that draw their nameplate amperage for minutes at a time, not hours. An EV charger pulls 48A continuously for six to twelve hours every night. The thermal profile is completely different. Conductors that survive intermittent duty fine will run noticeably warmer under continuous load, and warmer insulation ages faster. If the wire itself is too small, it overheats, and the recommendation is to stop using the circuit immediately and call an electrician. That's the failure mode #4 is buying insurance against.
When the breaker is 60A and the load is continuous 48A, you want #4 copper for the home run. Manufacturer guidance lines up with this. The Emporia Pro hardwire guidance describes the install at 48A with 6AWG THHN in conduit or 2/6 MC, either of which would utilize a 60A breaker, and that's for a SINGLE charger pulling 48A from the breaker. For two chargers on one breaker with a junction box in the middle, the home run from the panel deserves the upgrade to #4. The single-charger case tolerates #6 because the continuous load and the breaker rating land close together; the dual-charger case stacks the home run with the combined ceiling of both branches, and the conductor sees less thermal margin if a future homeowner ever swaps in a higher-current breaker or one of the chargers loses its load-sharing pairing.
One thing #6 absolutely is not appropriate for: do not let anyone talk you into #8 on a 60A breaker. According to the NEC, #8 AWG copper wire is only rated for 40 amps. #8 AWG aluminum wire is rated for just 30 amps. Neither has any business on a 60A circuit. If an electrician quotes you #8 NM-B for an EV install, find a different electrician.
Gear worth having
As an Amazon Associate, ThinkEV earns a small commission from qualifying purchases — at no extra cost to you.

AstroAI Portable Tire Inflator
One tap, it inflates to your exact PSI then stops automatically. Low tires cost 5 to 10 percent of your range, so this pays for itself in a week.
As an Amazon Associate, ThinkEV earns from qualifying purchases — at no extra cost to you.
Junction Box Strategy: When #4 to a Box, Then #6 to Each Charger Makes Sense
The layout for the two-Emporia-Pro configuration:
- Panel → junction box: #4 AWG copper, sized to the 60A breaker
- Junction box → charger A (6 feet away): #6 AWG copper, sized to the 48A continuous load
- Junction box → charger B (30 feet away): #6 AWG copper, same logic
The reason this works: after the junction box, each branch sees a maximum 48A continuous draw, that's the firmware-enforced ceiling for each individual unit when the other is idle. #6 copper handles 48A continuous comfortably, even derated for ambient and conduit fill. The Pro requires permanent wiring directly to a junction box, and professional installation is required.
What you cannot do is run #6 from the panel all the way to a junction box and then on to each charger. The panel-to-junction-box conductor is carrying the full 60A breaker's worth of potential load, both chargers' combined draw, and #6 is undersized for that segment under realistic Canadian conditions.
A few mechanical details matter:
- The junction box must be accessible. Buried in a wall, behind drywall, or inside the garage ceiling with no access panel is not legal. NEC 314.29 requires permanent accessibility.
- Box size matters. A 60A circuit with #4 entering and two #6 conductors exiting needs a junction box rated for the conductor fill. A 4"×4" deep box is the typical minimum; your electrician will size it to code.
- Terminations. All conductors must be landed in wire nuts or split-bolt connectors rated for the gauge. Mixing copper and aluminum here requires AL/CU-rated connectors, relevant if your panel feeds are aluminum.
- GFCI. The Emporia EV Charger has built-in GFCI protection. Do not install an external GFCI breaker on the circuit. A standard 60A two-pole breaker is correct. A GFCI breaker on this circuit will nuisance-trip and may damage the charger's internal protection.
The junction-box approach is what most experienced installers recommend for the two-charger-one-breaker case. It's code-compliant, it lets each branch use the lighter gauge appropriate to its actual load, and it gives you a clean termination point if you ever need to service one charger without de-energising the other.
There's a competing layout some installers prefer: two separate runs from the panel, each its own #6 cable, joined inside the first charger's enclosure rather than at a dedicated junction box. The argument for it is one fewer connection point and slightly less material cost. The first charger's enclosure becomes a de facto junction box it wasn't designed to be. Terminations crowd the unit's internal wiring, and if you ever need to swap that first charger you're disconnecting and re-terminating the feed to the second one. The dedicated junction box is $20 of hardware that pays for itself the first time a charger needs replacement.
The Geometry in Practice: One Charger Near the Panel, One Across the Garage
Now the actual geometry. Panel on one side of the garage, 18-foot door in the middle, one charger near the panel (6 feet of cable from panel to charger position) and one charger on the far wall (25 to 30 feet).
The junction box goes near the closer charger, call it 6 feet from the panel. That gives you:
- 6 feet of #4 from panel to junction box. At roughly $5/foot for #4 THHN copper at Canadian electrical wholesalers, that's about $30 in material for the home run. Add conduit, fittings, and the junction box itself, total material cost for this segment is around $80 to $120.
- A short jump (under a foot) from junction box to charger A. Code requires #6 from the box to the charger lug; in practice you'll have a couple of feet of slack for the box-to-charger termination.
- 25 to 30 feet of #6 from junction box to charger B. Across or above the garage door, in conduit. #6 copper THHN runs roughly $2.50 to $3.50 per foot, about $75 to $105 in wire for this segment.
The voltage-drop math on the 30-foot run is the question most installers want answered. #6 copper at 48A over 30 feet: voltage drop is approximately 1.4 to 1.6%, well under the NEC-recommended 3% maximum for branch circuits. The far charger will see roughly 236V instead of 240V at full draw, entirely within the Emporia Pro's operating window and unnoticeable in charging time.
Gear worth having
As an Amazon Associate, ThinkEV earns a small commission from qualifying purchases — at no extra cost to you.

Magnetic EV Charger Plug Cover
A magnetic cap that keeps rain, road salt, and grit out of your home charger handle between sessions.
As an Amazon Associate, ThinkEV earns from qualifying purchases — at no extra cost to you.
If your run from the junction box to the far charger pushes past 50 feet, the math changes. At 60 feet on #6 carrying 48A you're at around 2.8% drop, still legal, but approaching the limit. In that case the cleanest move is to upsize that single branch to #4 as well. For a 25-to-30-foot run, #6 is correct.
A note on cable type for the 30-foot run: 6AWG THHN in conduit or 2/6 MC cable both work for a 60A breaker EV install. The pattern shows up repeatedly in real-world installs, a documented Ford Lightning Forum 48A Emporia Classic hardwire install shows an installer initially planning 6/2 Romex and getting talked into MC cable instead, which is the right call for a 48A continuous EV circuit. Romex is fine for intermittent residential loads; MC or THHN in conduit is the standard for EV. THHN in conduit gives you more flexibility if you ever need to re-pull or upgrade; MC cable is faster to install but harder to modify later. Most Canadian residential installs choose MC for the surface runs and conduit only where the cable is exposed to physical damage.
Emporia Pro Load Balancing Setup: Making the Shared Circuit Work
The wiring is half the install. The other half is firmware. Get the Emporia app configuration wrong and the breaker trips the first time both cars plug in at the same time.
Setup order matters:
- Install both chargers hardwired and energise the circuit. Do not plug a car in yet.
- Pair both chargers in the Emporia app to the same account. They'll show up as separate devices initially.
- Enable Circuit Sharing mode. This is the firmware setting that turns the pair into a load-balanced group.
- Set the circuit limit to 48A. This tells the chargers the maximum combined draw they're allowed.
- Verify the pairing handshake before plugging in a car. Both units should show "circuit sharing active" status in the app.
The failure mode to understand: if one charger loses its Wi-Fi connection and falls back to standalone mode, it will attempt to draw its full configured amperage. If both chargers are set to 48A standalone and both lose pairing simultaneously, both will pull 48A, that's 96A total on a 60A breaker, which trips instantly.
Emporia's firmware is supposed to fail safe. In practice, the safer install is to set the per-charger maximum amperage in the app to 48A but configure the breaker-level setting to enforce the 48A combined ceiling at the firmware layer. If you're not comfortable with the app's settings hierarchy, this is the conversation to have with your installer, most certified Emporia installers in Canada will configure this before they leave.
Some installers prefer to wire a dedicated load-monitoring CT clamp around the circuit's hot conductors at the panel. The clamp feeds real-time amperage data to the master charger, which then throttles both units. This is more robust than Wi-Fi-only pairing but adds about $80 to $120 in hardware. For a two-charger install with a load you'll actually push, the CT-clamp setup is the upgrade.
Firmware updates are a quiet install risk, Emporia has shipped versions that changed pairing behaviour mid-season. Check the Emporia community forums before applying a major firmware update on a paired install, and roll updates one charger at a time, never both simultaneously. This is also where the parallel to commercial load-management hardware bites: SWTCH-style energy-management systems on commercial sites push their throttling logic into dedicated hardware precisely because firmware drift across a fleet is harder to contain than a single bad update on one home install. The residential equivalent is the CT clamp, same philosophy, smaller footprint.
Tesla Supercharger stalls are paired, sharing a power cabinet; when both stalls in a pair are occupied the power splits between them, reducing each vehicle's maximum charging speed, same split logic, different physical layer. Tesla manages that split in the power cabinet itself, a hardware-level handshake. The Emporia pair, in standard configuration, manages the same split over your home network. The reliability gap between "two devices on the same Wi-Fi SSID" and "two devices on the same physical bus" is the gap a CT clamp closes. For a residential install, Wi-Fi is usually fine. For a residential install where the breaker has to hold every time, the CT clamp is the upgrade that pays for itself the first time your router goes down on a Tuesday night.

What This Costs in Canada and Whether a Second Breaker Pencils Out
Material and labour for the shared-circuit install, in Canadian dollars, mid-2026 pricing:
- #4 copper THHN, 10 feet: $40–$60
- #6 copper THHN, 35 feet: $90–$120
- Junction box, 4×4 deep, with cover: $15–$25
- Conduit, fittings, straps: $40–$70
- 60A two-pole breaker (non-GFCI): $35–$55
- Wire nuts, anti-oxidant compound, miscellaneous: $20–$30
Material total: roughly $240 to $360.
Electrician labour is the bigger number and varies sharply by region. A typical residential install of two hardwired Level 2 chargers with a junction box runs $600 to $1,100 in Vancouver and Toronto, $400 to $700 in Calgary and Edmonton, and $350 to $550 in smaller markets. Add $150 to $300 if the electrical panel needs a service-load calculation or a permit upgrade, most municipalities require both for a 60A EV circuit.
Permit cost varies: BC Electrical Safety permit is around $80 to $120, Ontario ESA permit is $80 to $150 depending on municipality, Quebec Régie du bâtiment is similar. The permit is non-negotiable. An unpermitted EV circuit will void your home insurance in the event of a fire, and most provincial inspectors are now specifically flagging EV installs for review.
Total install: $1,100 to $1,700 for two Emporia Pros on one shared 60A circuit, including permit.
Now the question that determines whether you go with the shared circuit or two separate breakers: does your panel have the capacity?
A 200A service can typically support two 60A EV circuits if the rest of the house's load is moderate (no electric heat, no electric dryer running simultaneously). A 100A service often cannot, and in that case, the shared 60A circuit is the only option short of a full service upgrade. A service upgrade from 100A to 200A in Canada runs $2,500 to $5,000 depending on whether the utility needs to upgrade the drop.
If you have 200A service and two open breaker slots, two separate 60A circuits is the cleaner install: no firmware dependency, no shared-load logic, both cars charge at full 48A simultaneously. The math: roughly $400 to $600 in additional material and labour over the shared-circuit approach. For most households charging two cars overnight, that delta is not worth it. For households where both cars routinely arrive home with low charge and need a fast turnaround, it is.
One thing that trips people up: iZEV rebates the car, not the charger. There is no current federal rebate for Level 2 hardware. Provincial programmes vary, BC's CleanBC EV Charger Rebate offers up to $350 per Level 2 charger for single-family homes (subject to programme availability and budget), Quebec's Roulez vert programme has historically offered up to $600 per charger plus an installation rebate, and Nova Scotia's EV programme has offered $500 per home charger. Check each programme's current status before booking the install, provincial budgets shift annually and the rebates can pause without warning.
For broader context on charger installation across the country, the complete EV charging guide for Canada maps out network coverage, home setup options, and provincial cost variation by region. The underlying wire-sizing reference, a 40-amp Level 2 circuit requires 8 AWG copper wire; a 50-amp circuit requires 6 AWG; a 60-amp circuit requires 4 AWG, is the cleanest summary of why the home run on this install lands on #4.
Gear worth having
As an Amazon Associate, ThinkEV earns a small commission from qualifying purchases — at no extra cost to you.

Grizzl-E Classic Level 2 EV Charger (40A)
Canadian-made and rated for minus 40C winters. 40A / 9.6 kW, NEMA 14-50, indoor/outdoor, 24-ft cable. The charger built for Canadian weather.
As an Amazon Associate, ThinkEV earns from qualifying purchases — at no extra cost to you.
FAQ: Two Emporia Pros, One Circuit
What to Budget and Which Configuration Fits Your Household
The right answer for this install is #4 copper from the panel to a junction box, then #6 copper from the box to each charger. The home-run conductor has to be sized to the 60A breaker, and #6 doesn't survive Canadian-garage ambient derating with margin to spare.
Budget $1,100 to $1,700 for the full install including permit. Check whether BC CleanBC or Quebec's Roulez vert have charger rebates open in your timing window, both have historically offset $350 to $600 of the cost, but provincial programmes pause and reopen without much warning.
The verdict for the three buyer cases:
- Buy today, two daily commuters, 200A service: install two dedicated 60A circuits with #4 home runs. Skip the shared-circuit layout. The $400–$600 delta buys you no firmware dependency and full 48A on both cars simultaneously.
- Buy today, one commuter plus one weekend car, any service size: the #4-to-junction-box, then-#6-to-each-charger layout above. Shared 60A circuit, Emporia firmware load-sharing, CT clamp optional but recommended.
- Defer six months, one driver can tolerate a slower interim solution: wait. If Emporia (or a competitor) ships a hardwired-CT residential pair within the year, the firmware-dependent failure mode goes away. The #4 home run still applies, only the load-management hardware changes. Interim option: a single 40A Level 1 or shared Grizzl-E Duo on a 40A circuit covers one car at full speed and the other at a trickle.
The wiring above is forward-compatible with whatever Emporia ships next. #4 to a junction box does not become wrong if the load-sharing brain moves from Wi-Fi to a CT clamp; the conductor sizing is the conductor sizing.
Until then, the install above is the one that passes inspection, charges both cars overnight, and doesn't ask the firmware to do anything the wiring couldn't already enforce.
Gear worth having
As an Amazon Associate, ThinkEV earns a small commission from qualifying purchases — at no extra cost to you.

ChargePoint Home Flex Level 2 Charger (50A)
Premium 50A / 12 kW charger with the best app ecosystem. Hardwired or NEMA 14-50, with real-time energy tracking and smart scheduling.
As an Amazon Associate, ThinkEV earns from qualifying purchases — at no extra cost to you.